The Application Permission includes authentication for Graph, Exchange Online and SharePoint Online / OneDrive.
Quick Overview of API Permissions using Graph Application Permissions
Rights for PoC
User.Read (AD)
User.Read.All (AD)
Directory.Read.All (AD)
Mail.Read (Exchange Online)
Mail.Send (Sends Reports)
Return URL for PoC https://signup.dataandmore.com/api/authorize_redirect
_____________________________________________
Rights for Production
Mail.ReadWrite (Exchange Online)MailboxSettings.ReadWrite (Outlook Categories) * Optional
Contacts.Read (Extract Known Persons)
OptionalFiles.ReadWrite.All (OneDrive)
Sites.FullControl.All (SharePoint)Sites.ReadWrite.All (SharePoint)
InformationProtectionPolicy.Read.All (CoPilot Protection)
Redirect URL Azure AD Authentication We need to add a 'Redirect URL' and the platform have to be 'Web' . "the primary server domain" + "/api/auth/ad/login/authorized"So if your server domain is: https://gdpr.dataandmore.com then redirect URL should be: https://gdpr.dataandmore.com/api/auth/ad/login/authorizedAnd a universal return URL for PoChttps://signup.dataandmore.com/api/authorize_redirect
Office 365 Exchange Online Application Permission
This application permission is based on EWS and is only in-use if OnlineArchive are to be scanned.
full_access_as_app
Send the applications id (client id) to support@dataandmore.com
Send the secret value (NOT secret id) directly to your contact in Data & More
Step-by-Step Guide
1. Application Registration
Go to portal.azure.com and log in with the global admin of your 365 domain. Search and select App Registration.
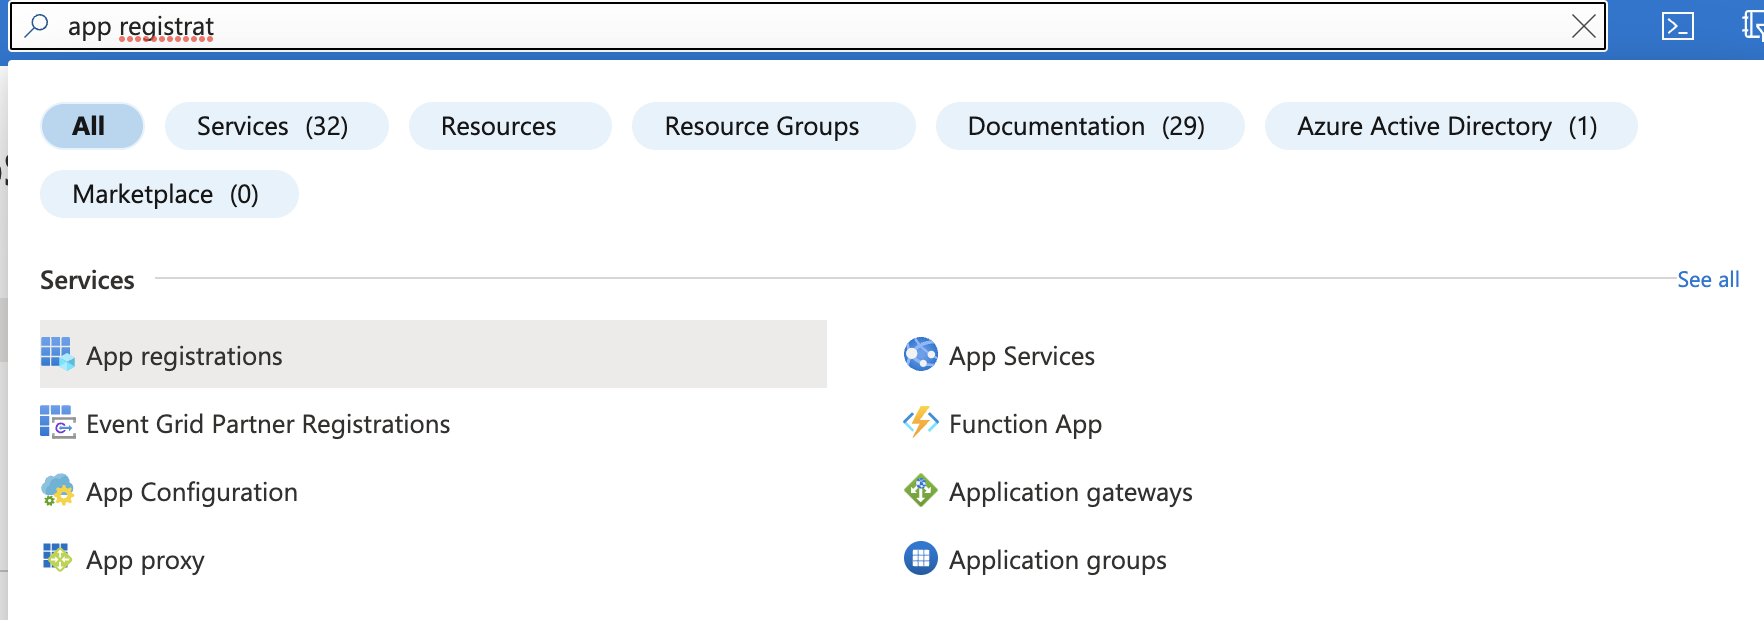
You’ll see a list of all your registered applications and a few options at the top. Select New registration.

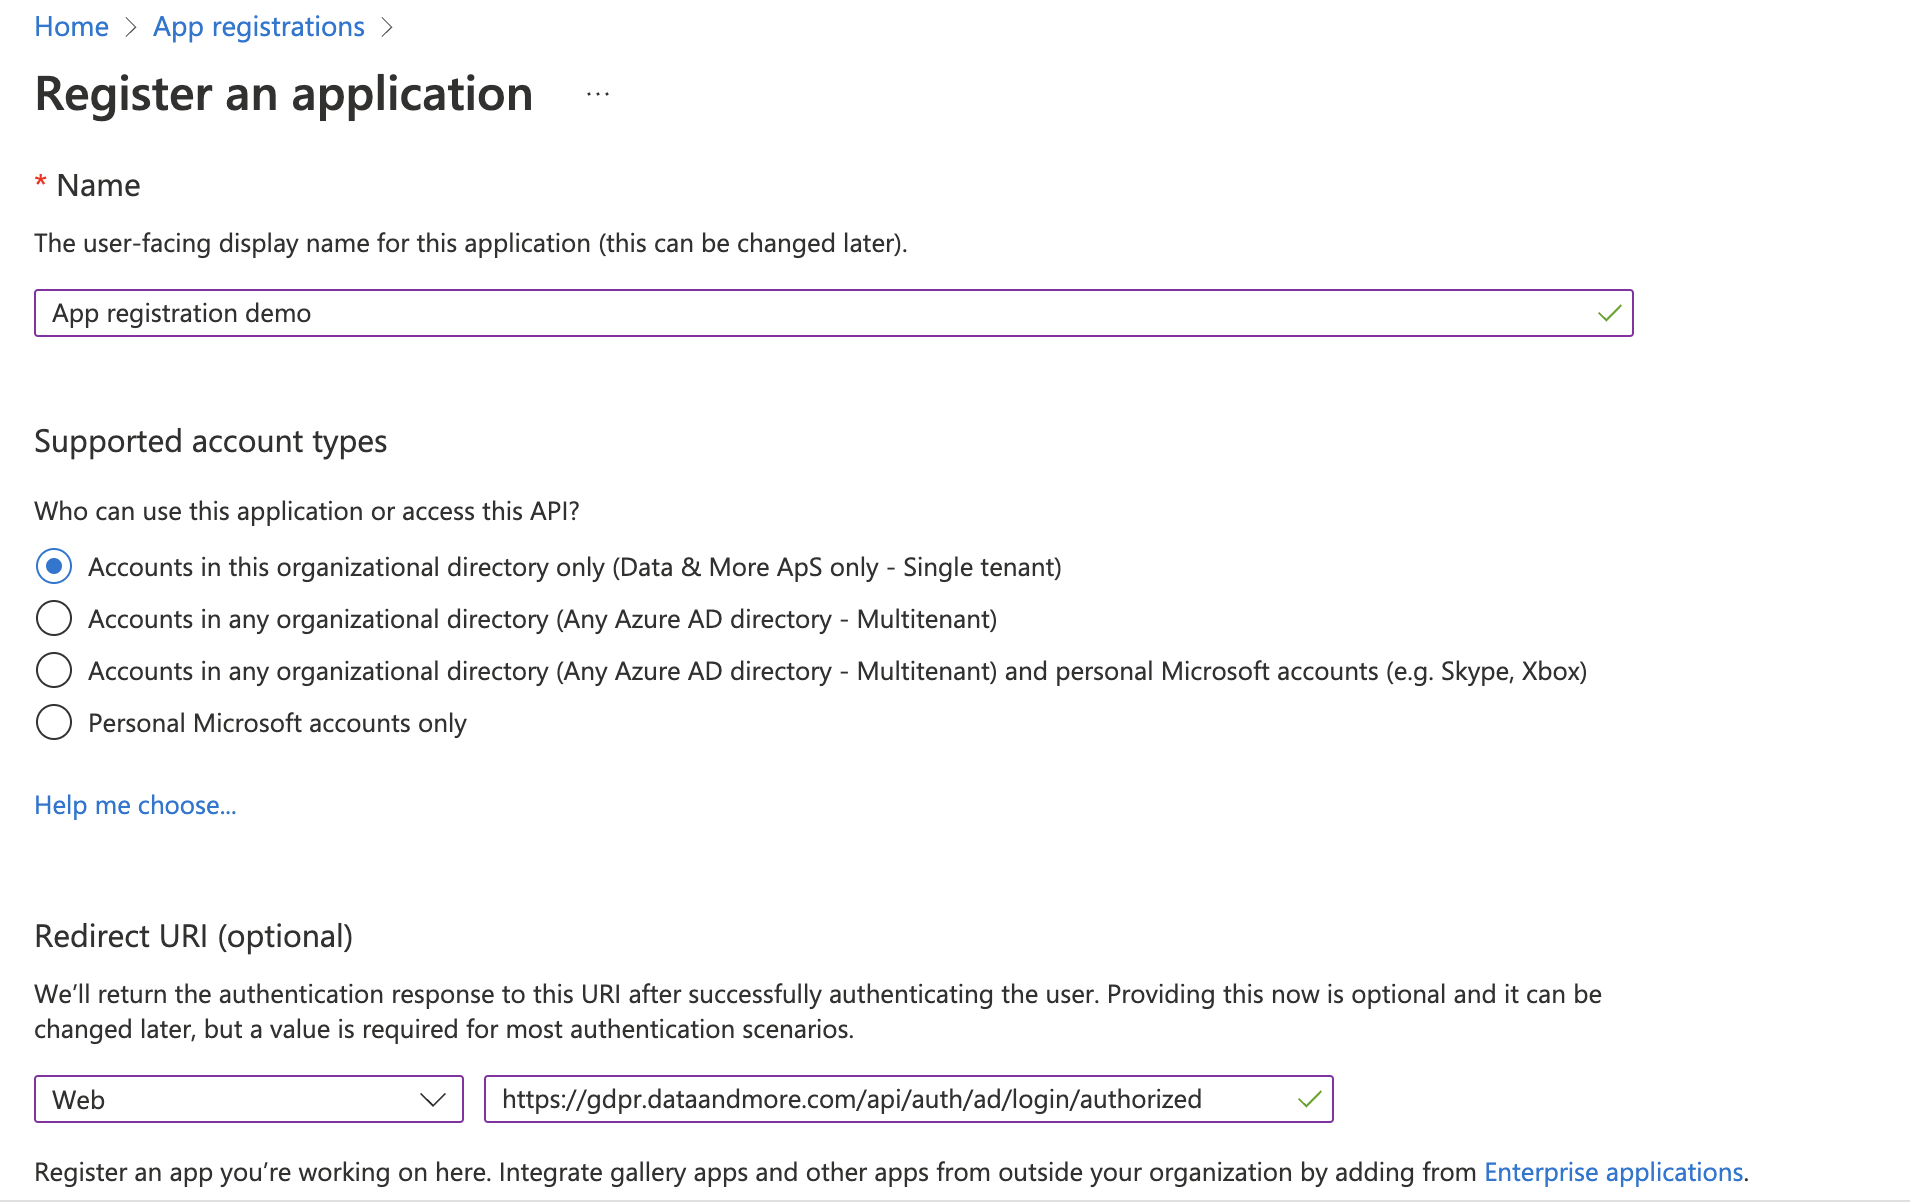
When creating new app registration, you’ll need to name it, choose who can use it and enter a redirect URL.
Redirect URL - "the primary server domain" + "/api/auth/ad/login/authorized"
So if your server domain is: https://gdpr.dataandmore.com the redirect URL should be:
https://gdpr.dataandmore.com/api/auth/ad/login/authorized
Click on the Register button on the bottom left.
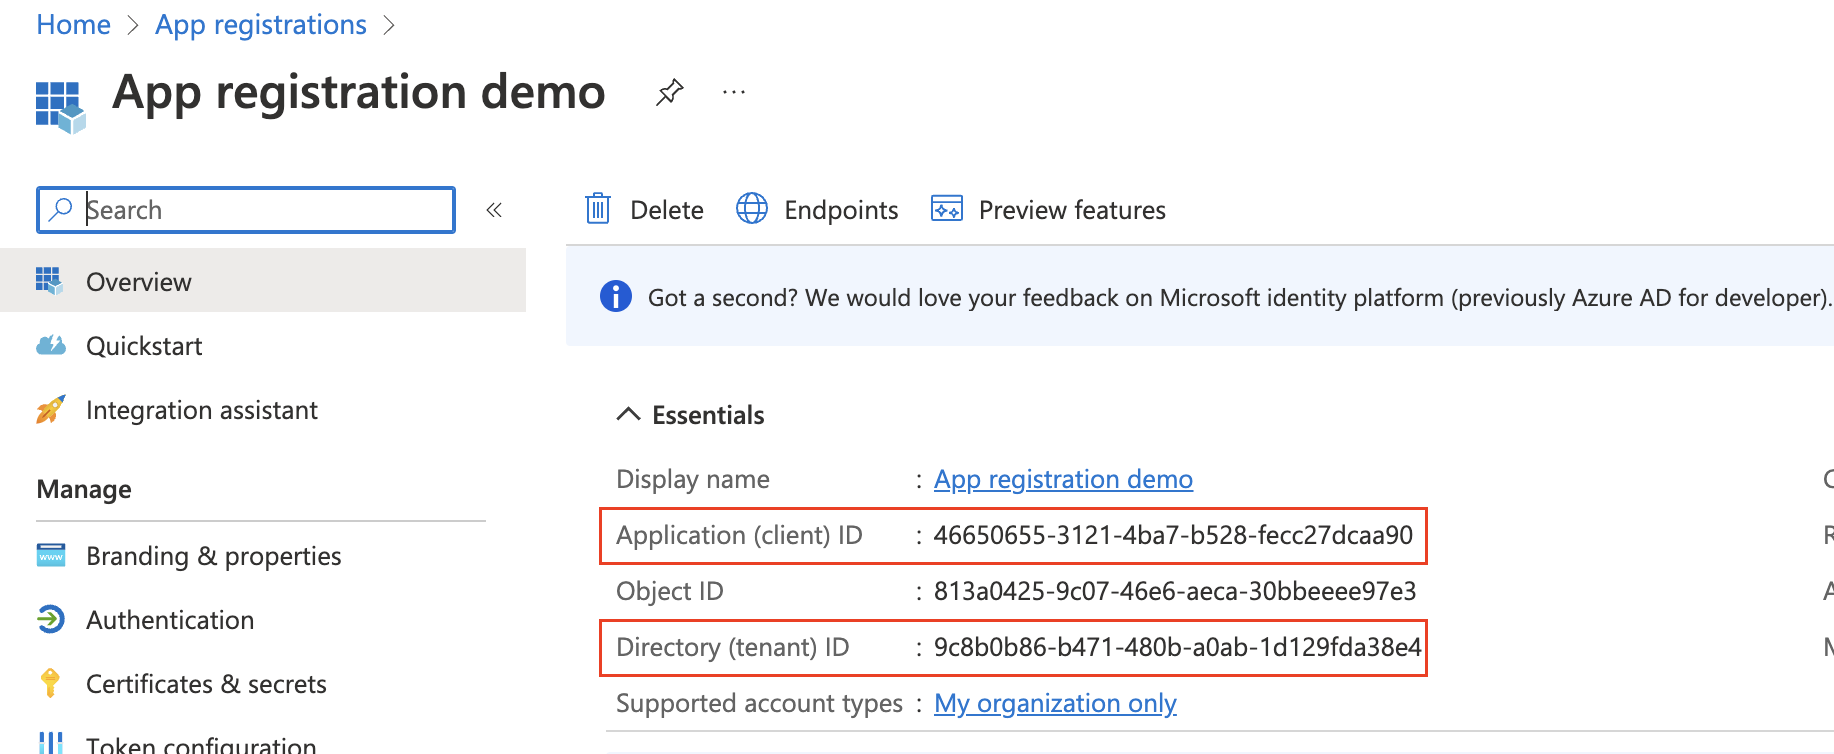
When app registration is created, you’ll see the Overview page with all the details such as Name, Client ID, Tenant ID, Object ID and so on.
2. API permissions
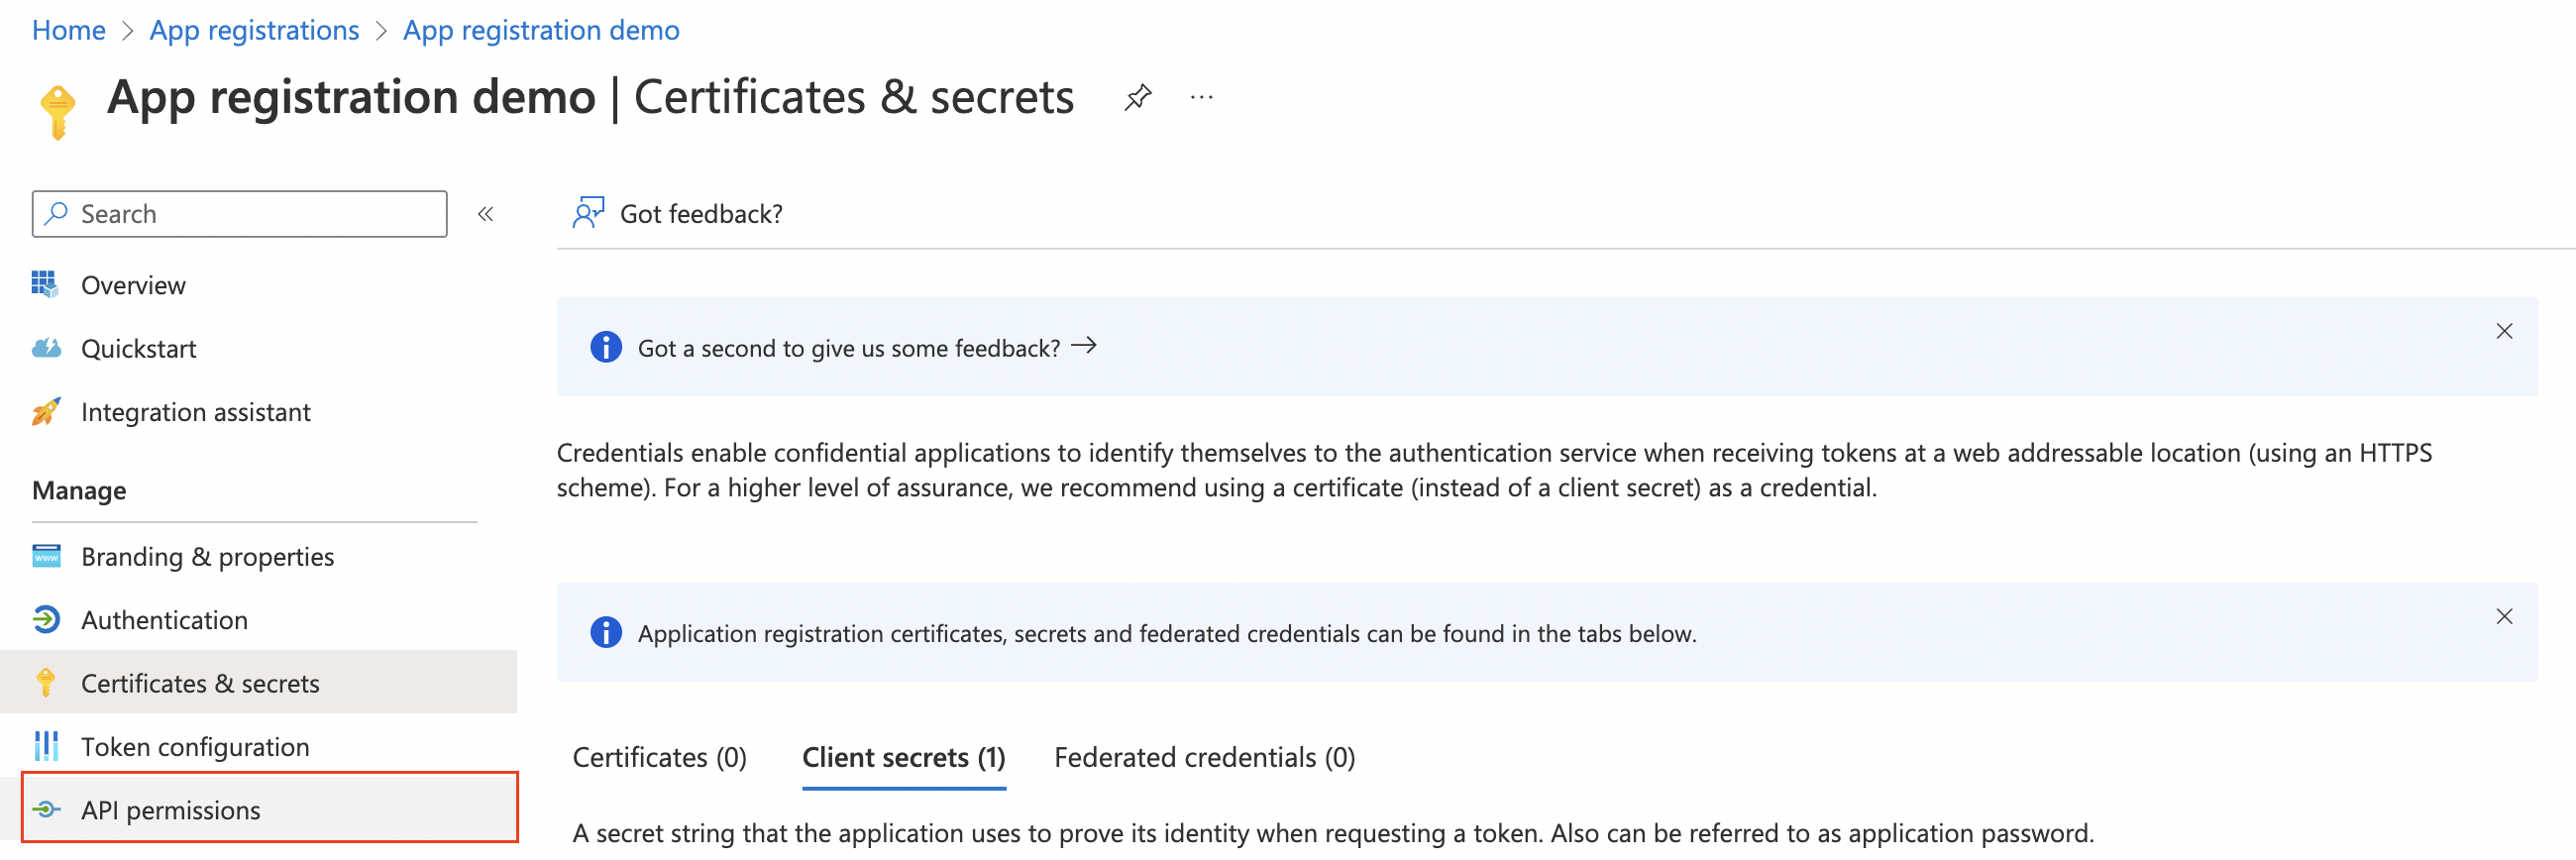
Go to API Permissions which can be found on the left side.
Click on Add a permission.
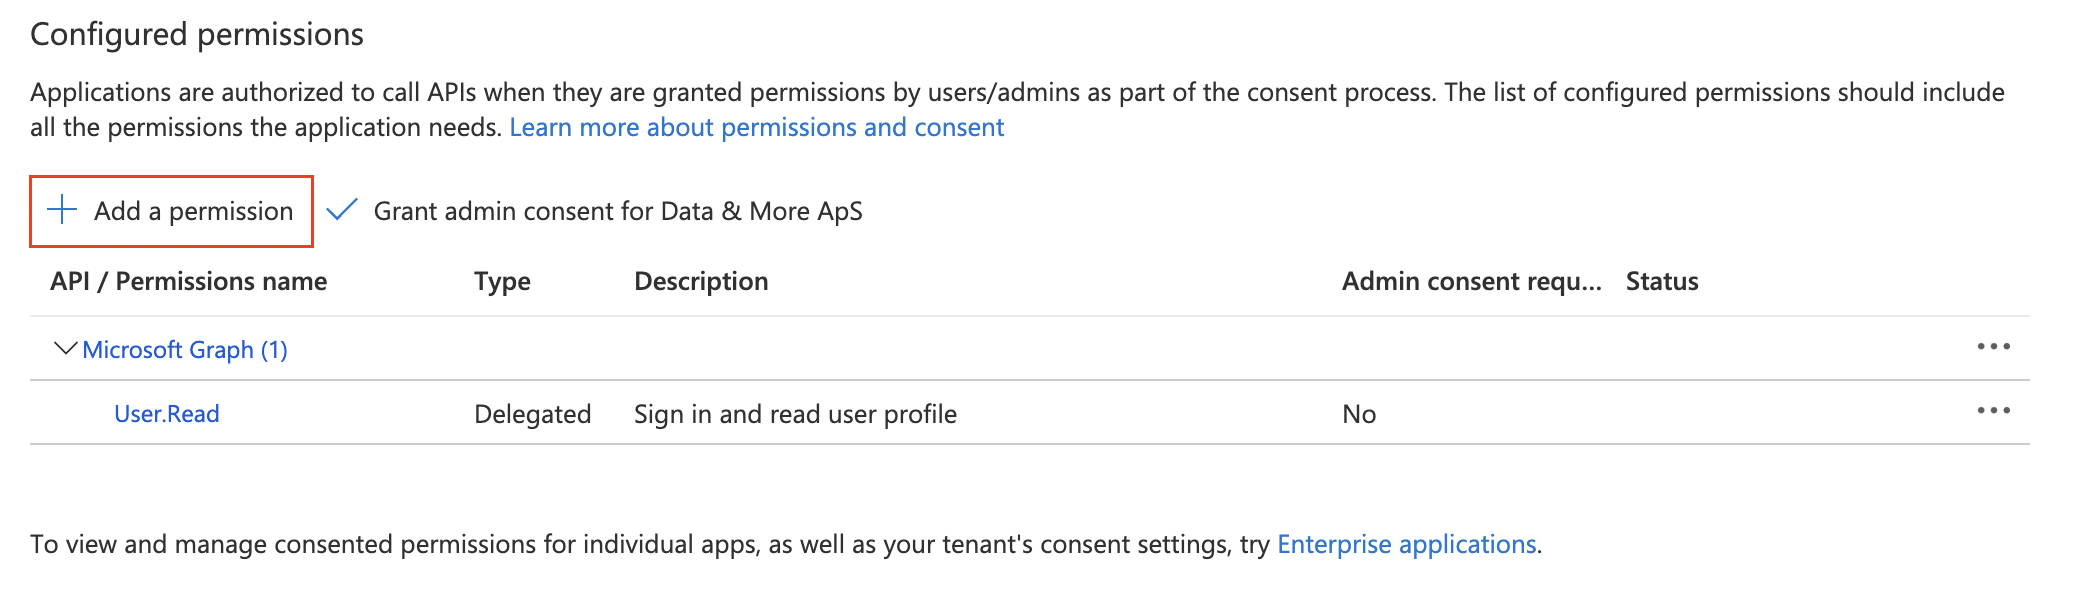
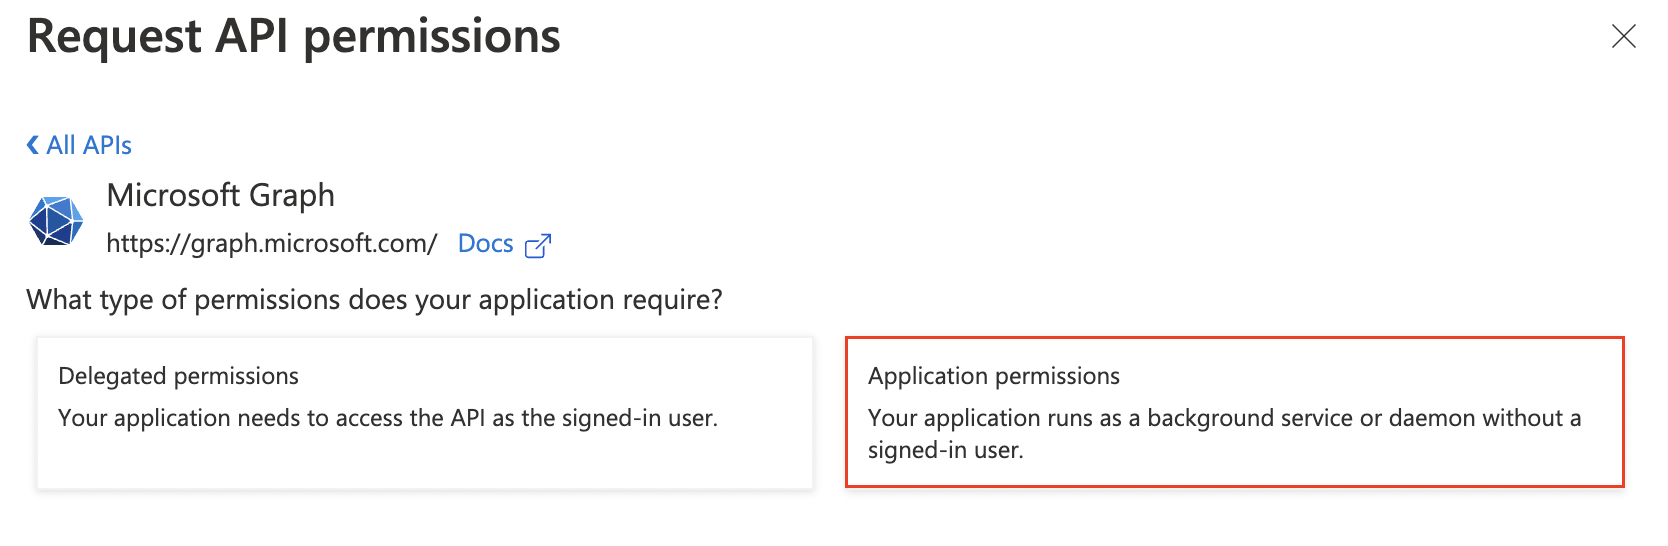
Click on Microsoft Graph and select Application permissions
Add the following permissions:
User.Read (AD)
User.Read.All (AD)
Directory.Read.All (AD)
Mail.ReadWrite (Exchange Online)
Mail.Send (Sends Reports)
Contacts.Read (Extract Known Persons)
MailboxSettings.ReadWrite (Outlook Categories)
Files.ReadWrite.All (OneDrive)
Sites.FullControl.All (SharePoint)
Sites.ReadWrite.All (SharePoint)
Click on Add permissions.
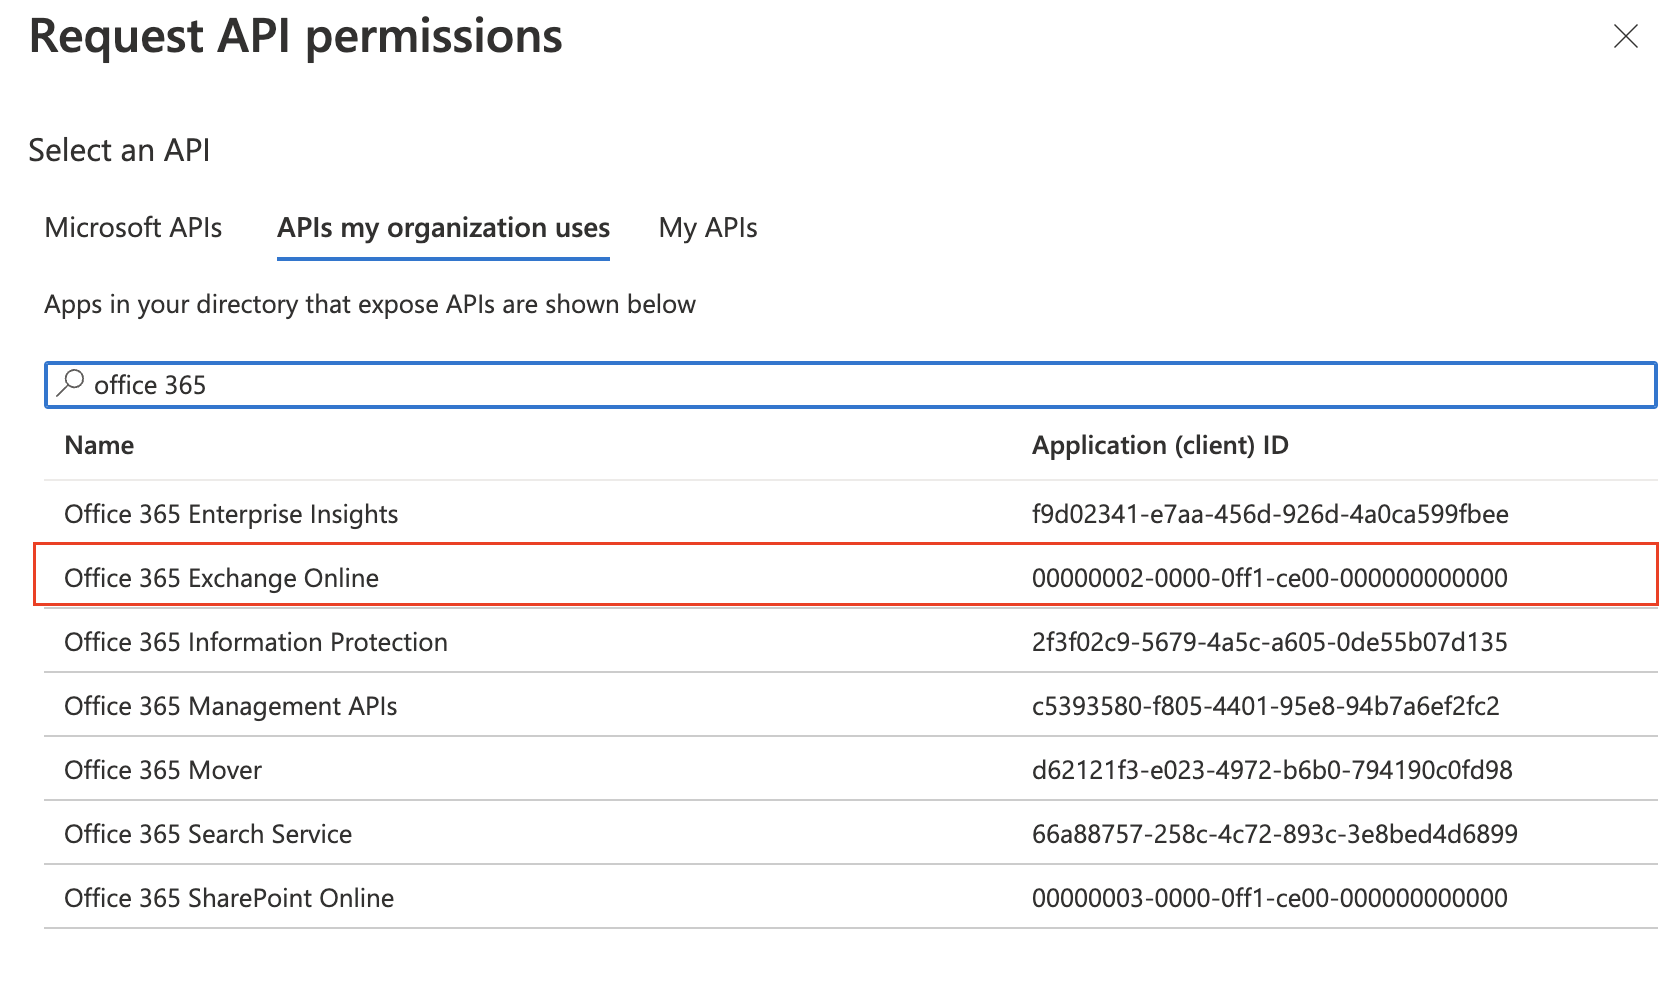
After adding Microsoft Graph API permission, you need to add one more - Office 365 Exchange Online.
To do that, again click on Add a permission, but this time go to APIs my organization uses tab and search for Office 365 Exchange Online.
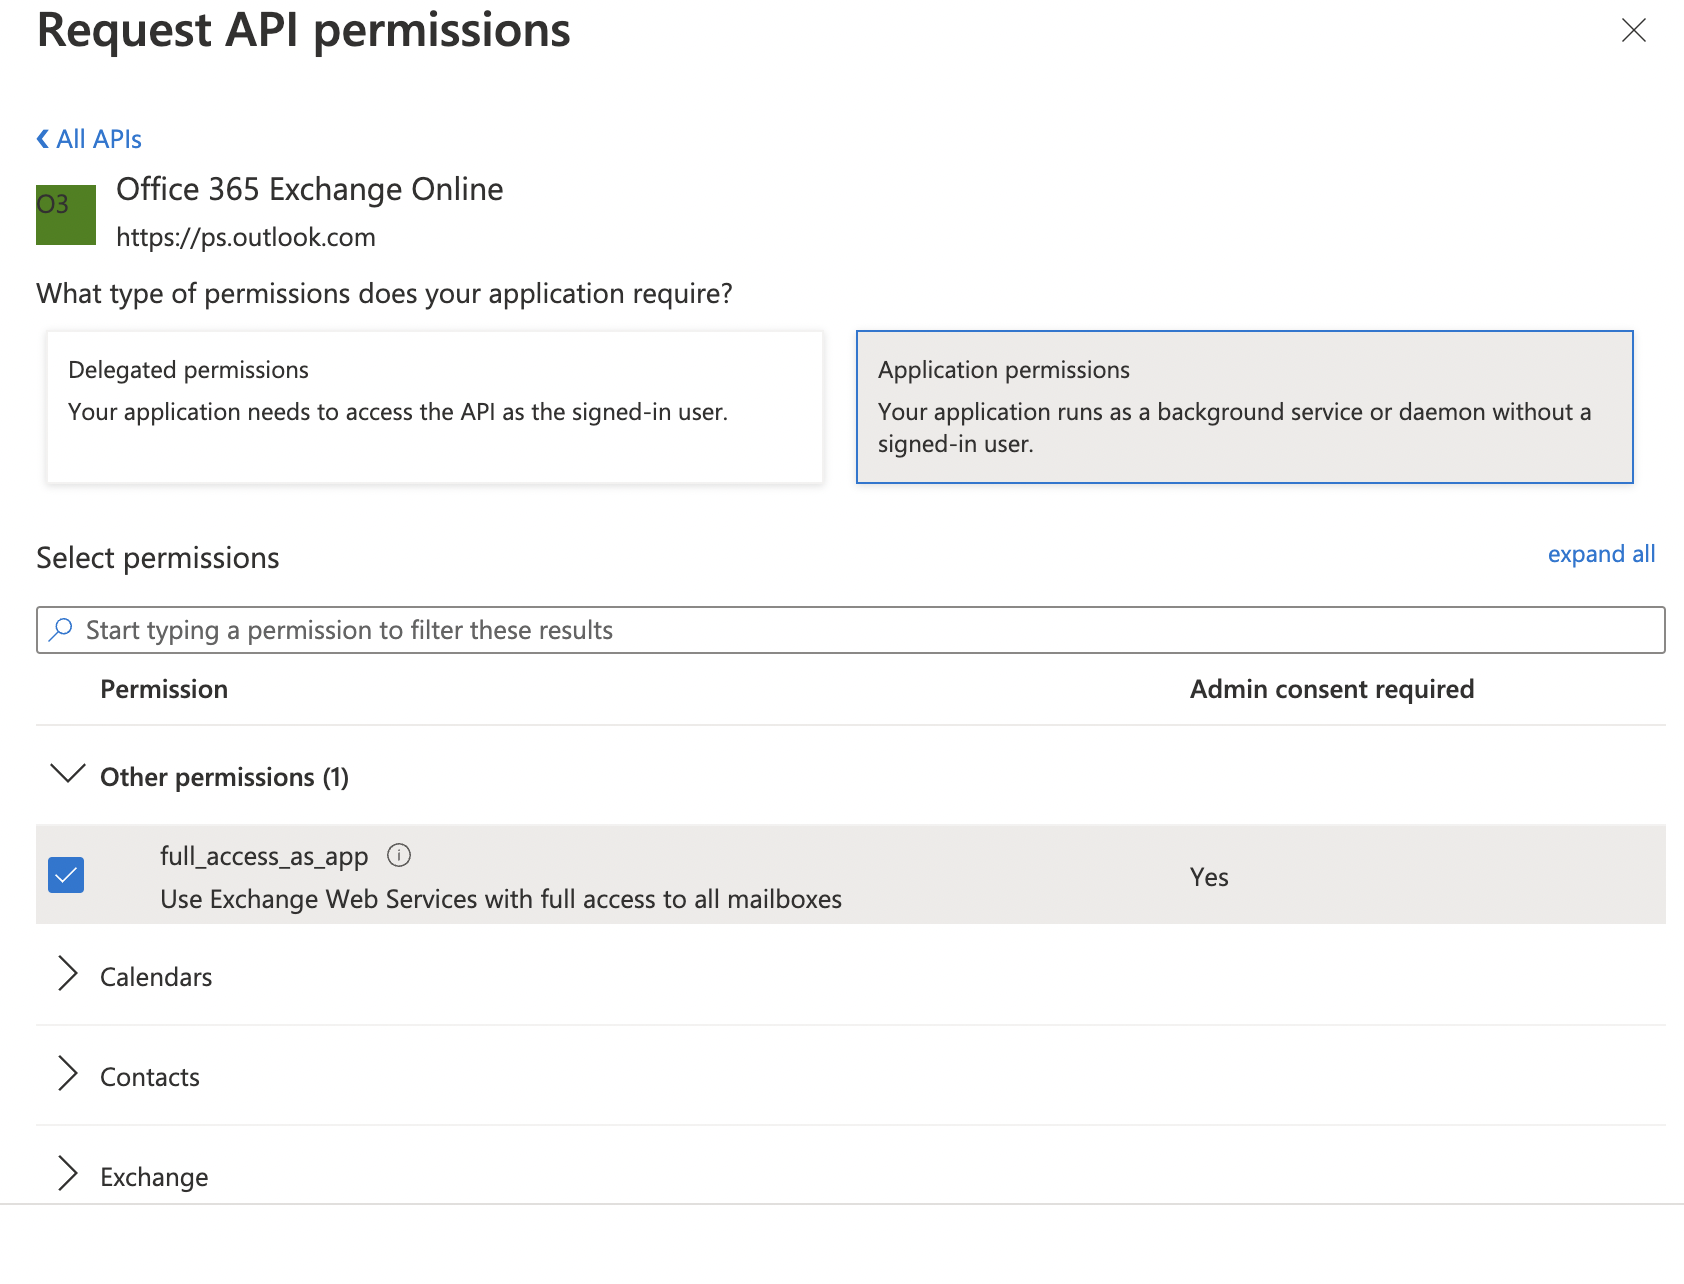
Click on Application permissions, select full_access_as_app and click on Add permissions button.
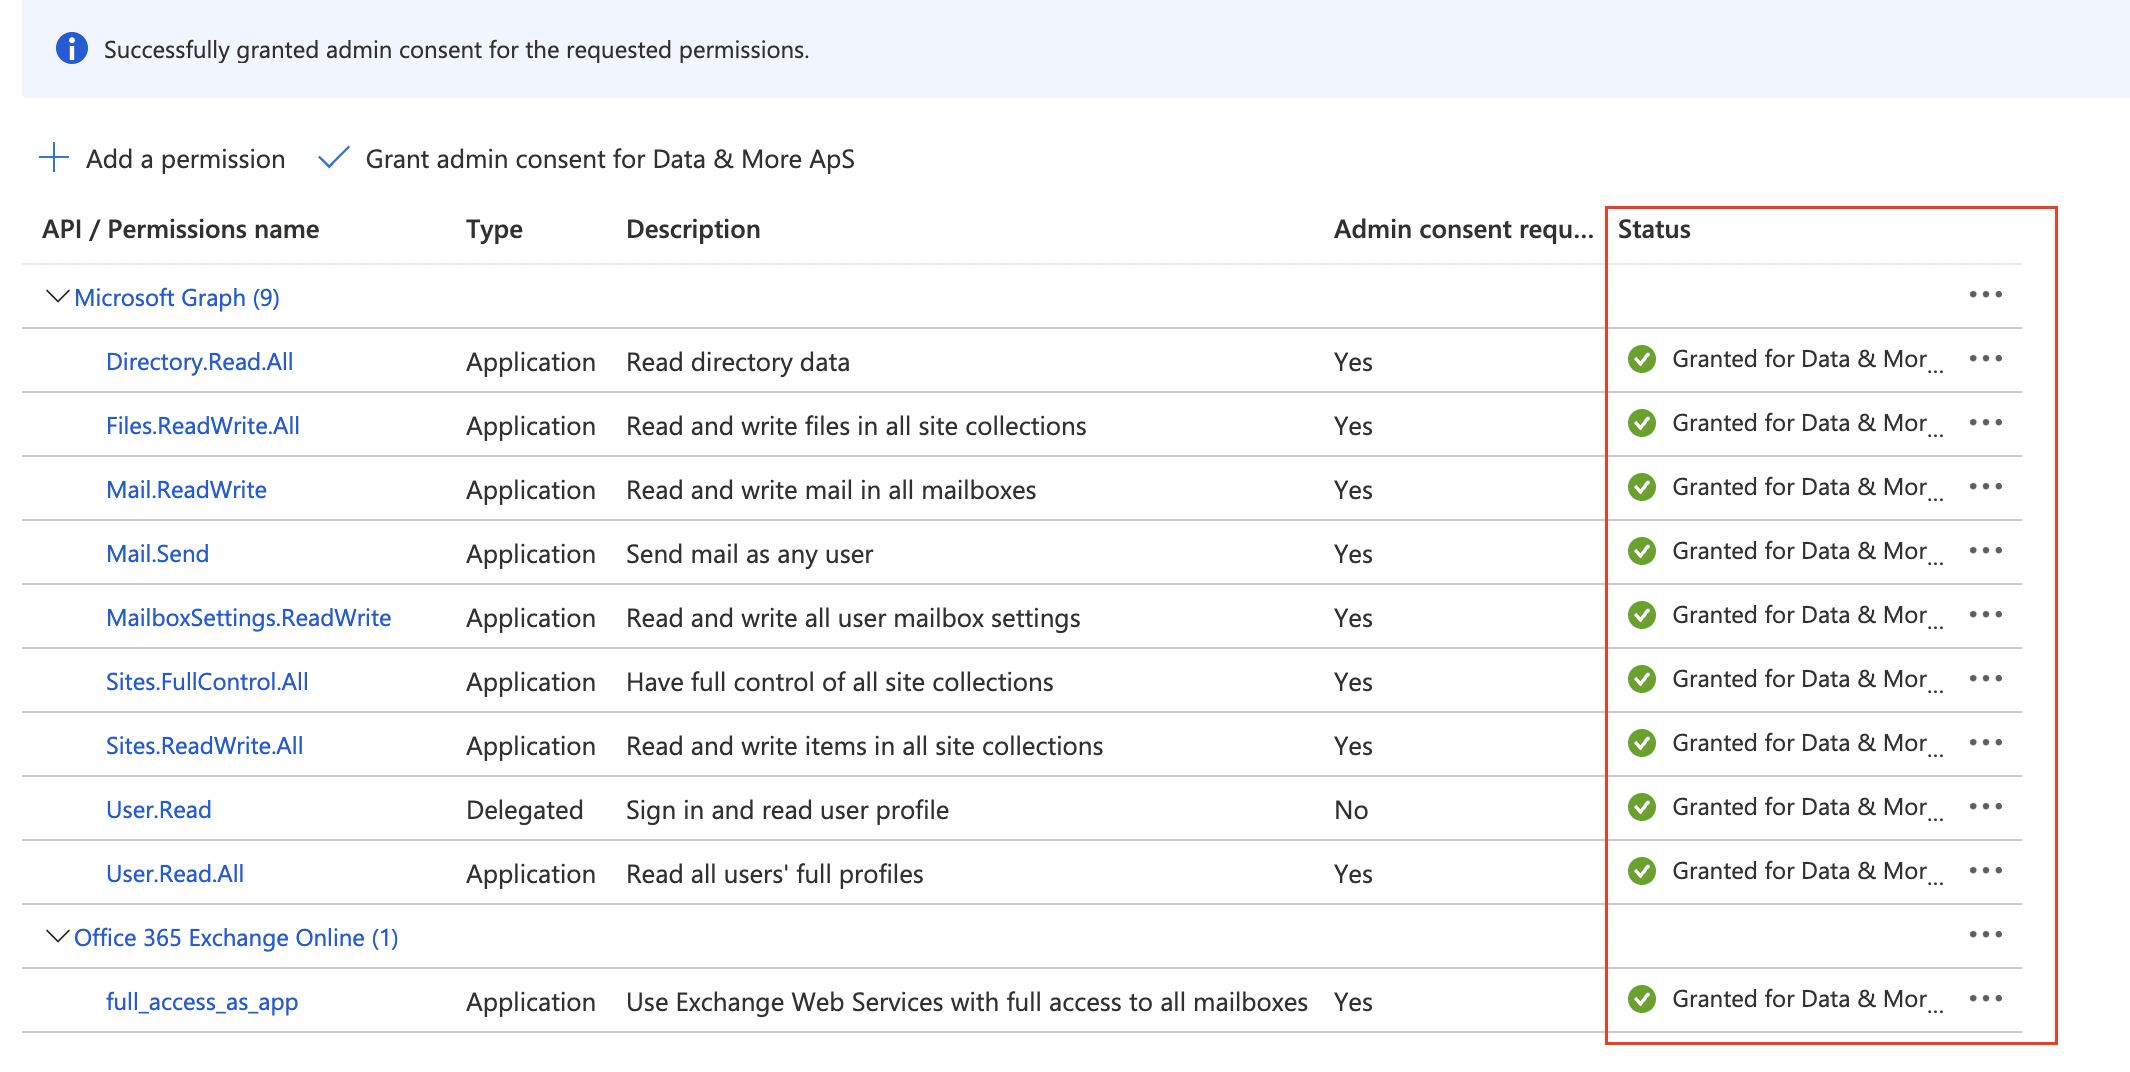
The last step is to Grant admin consent for the added permissions. To do that, simply click on Grant admin consent on the top of the table and confirm the action in the pop up window.
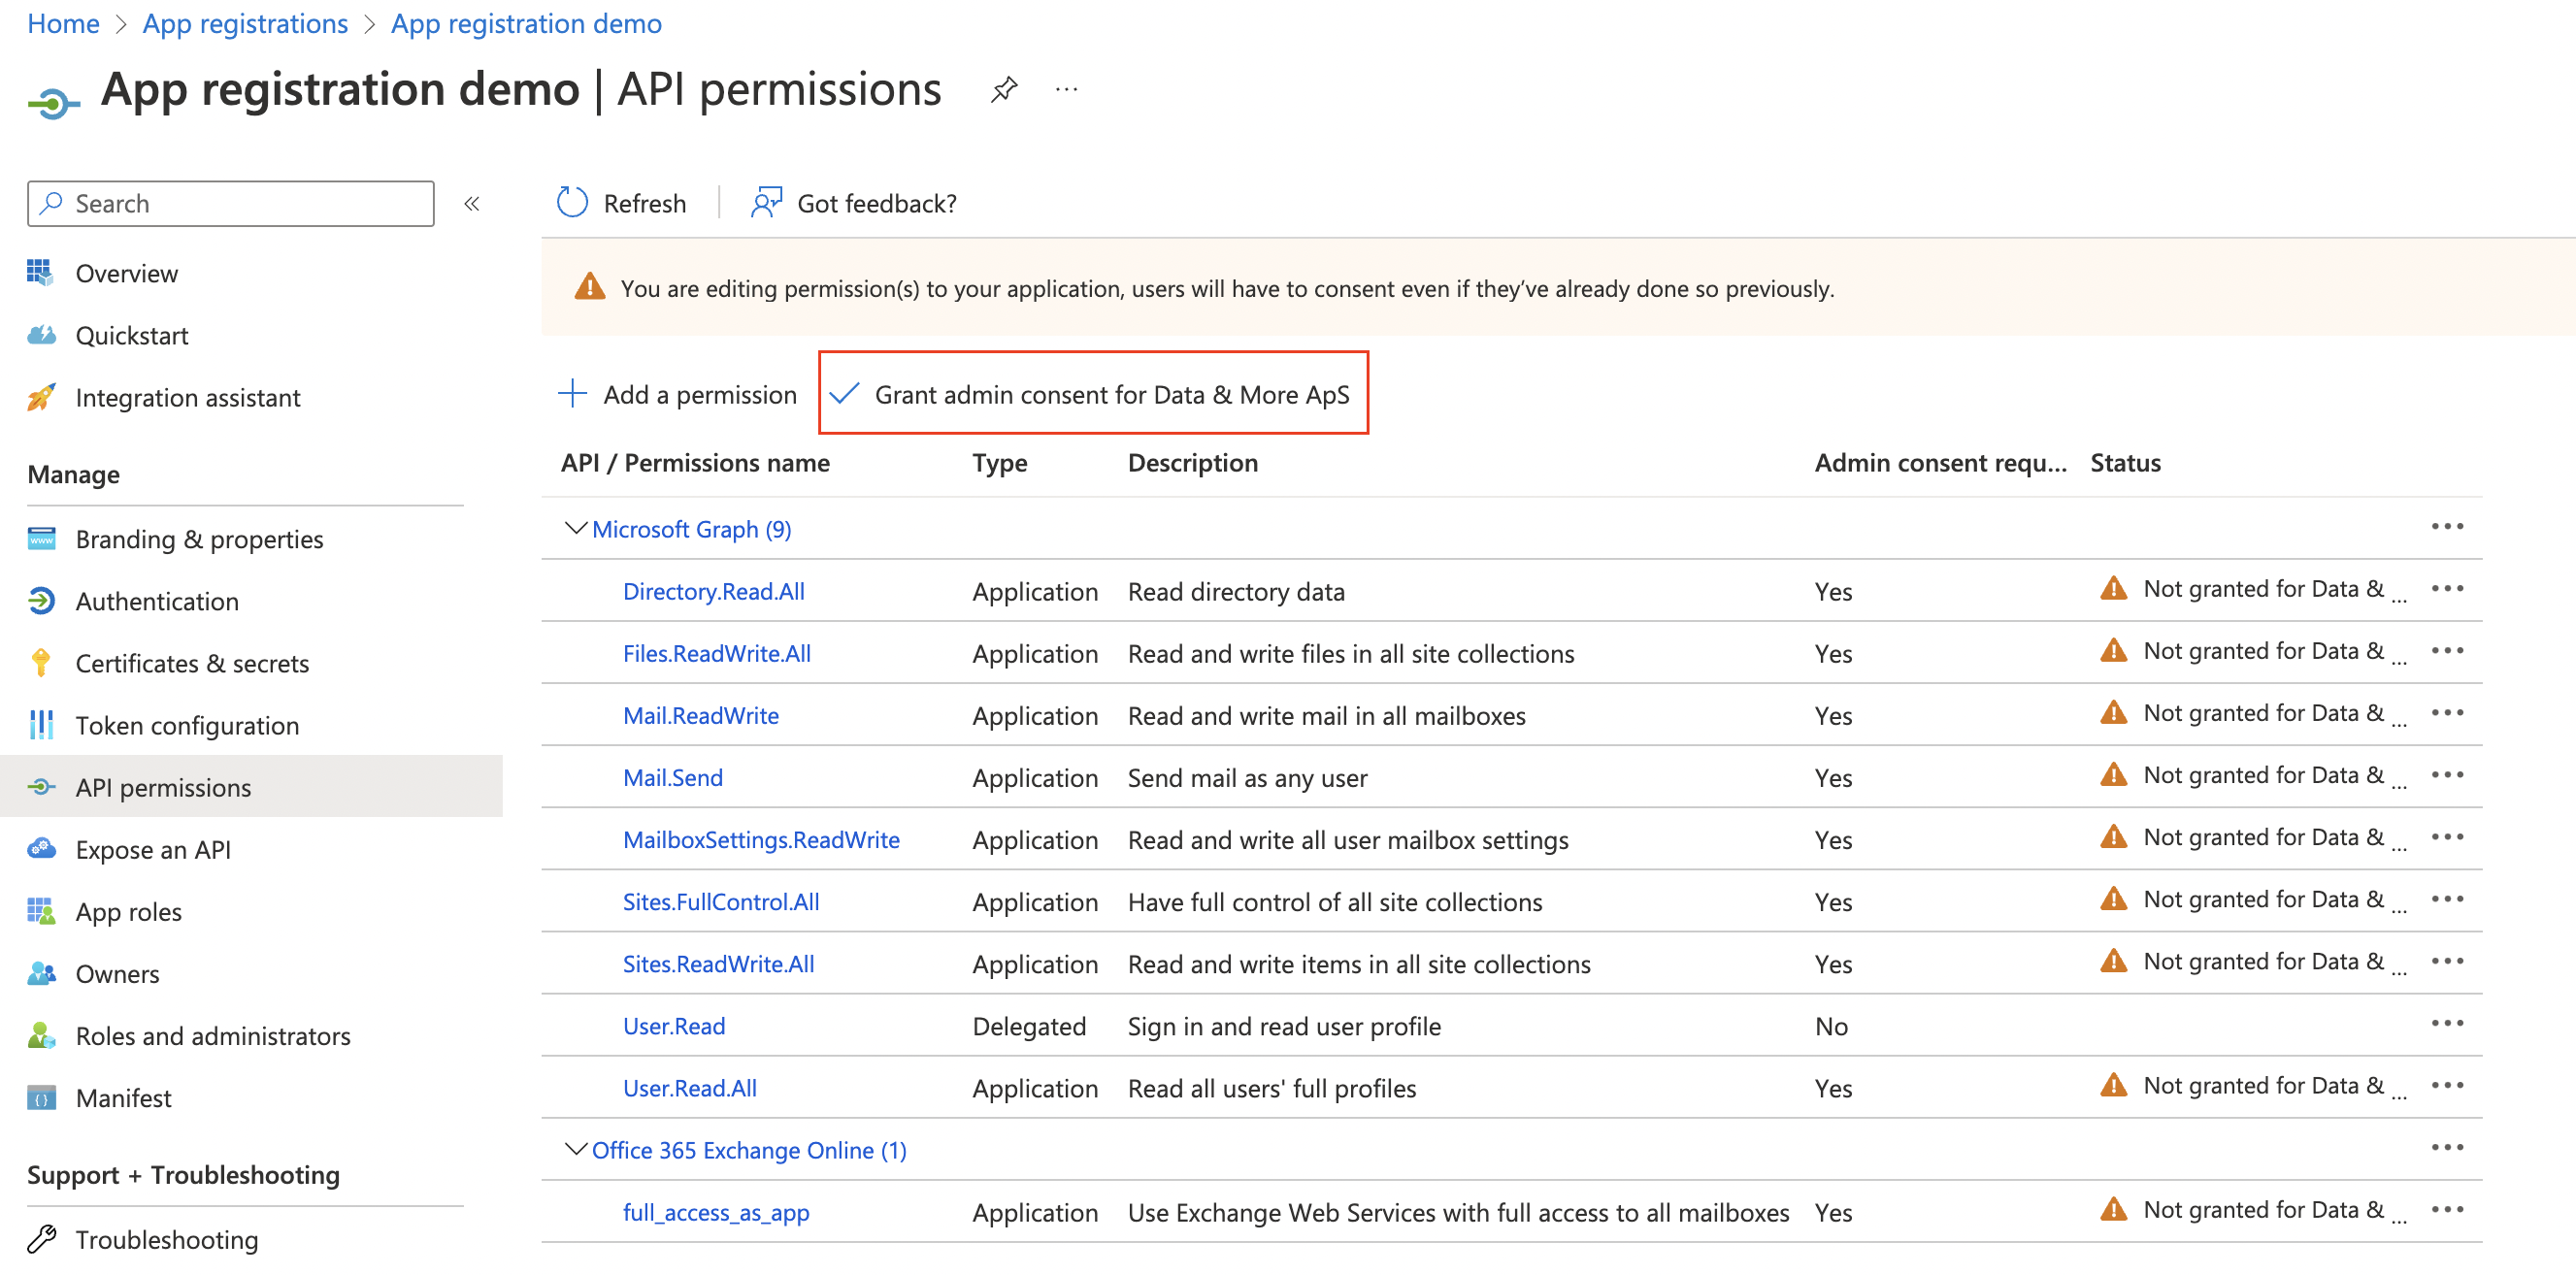
If you successfully did that, your table should look like this:
3. Keys
If you go to the Overview page of your app registration, you'll see all the details such as Name, Client ID, Tenant ID, Object ID and so on.
You need to provide Data & More with: Client ID, Tenant ID and Secret Value.
Client ID and Tenant ID can be found on the Overview page.
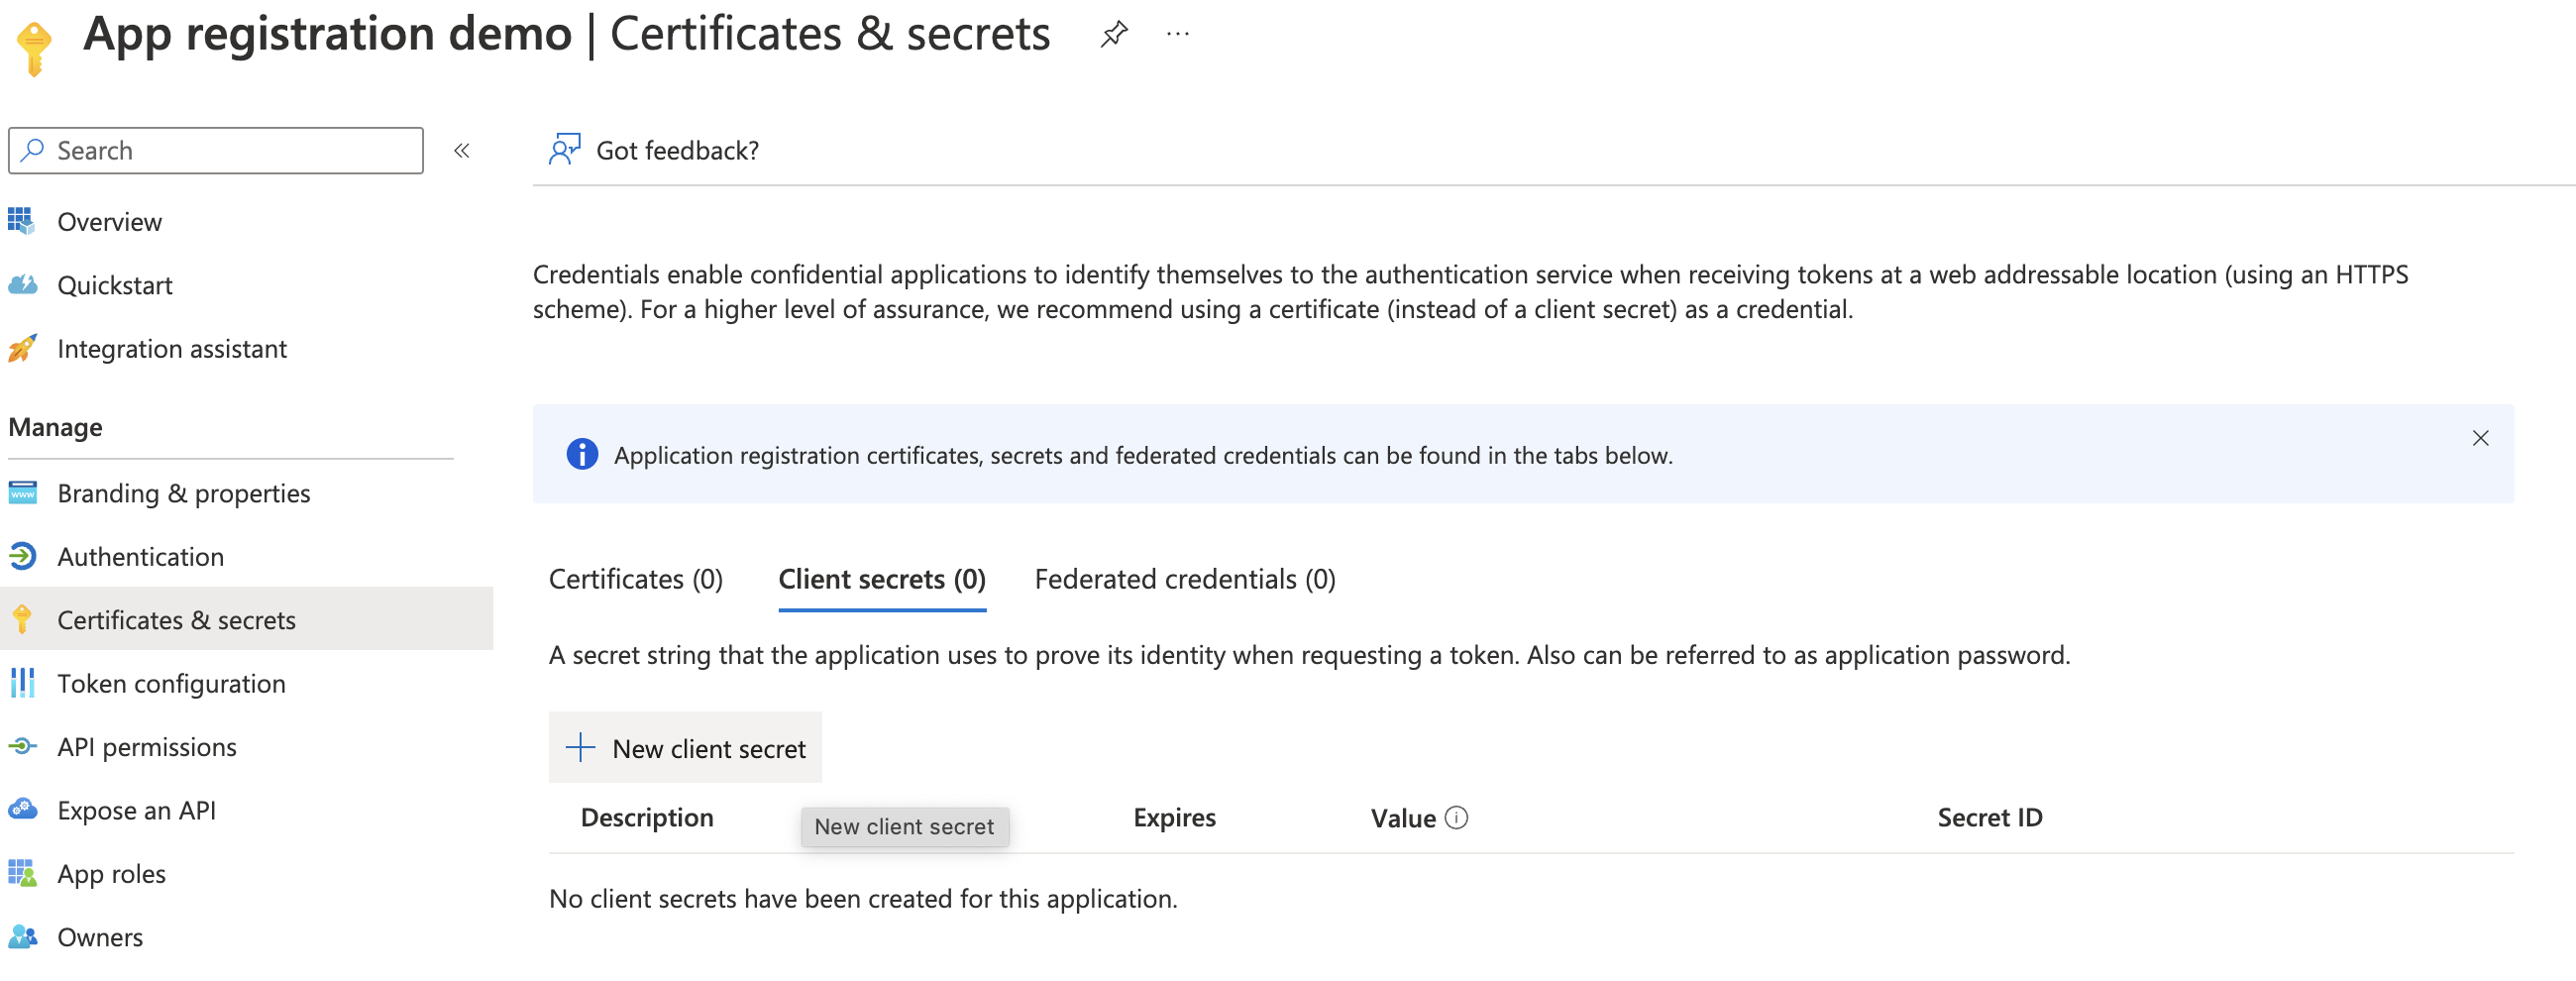
To get Secret Value, you need to go to Certificates & secrets on the left side and click on New client secret.
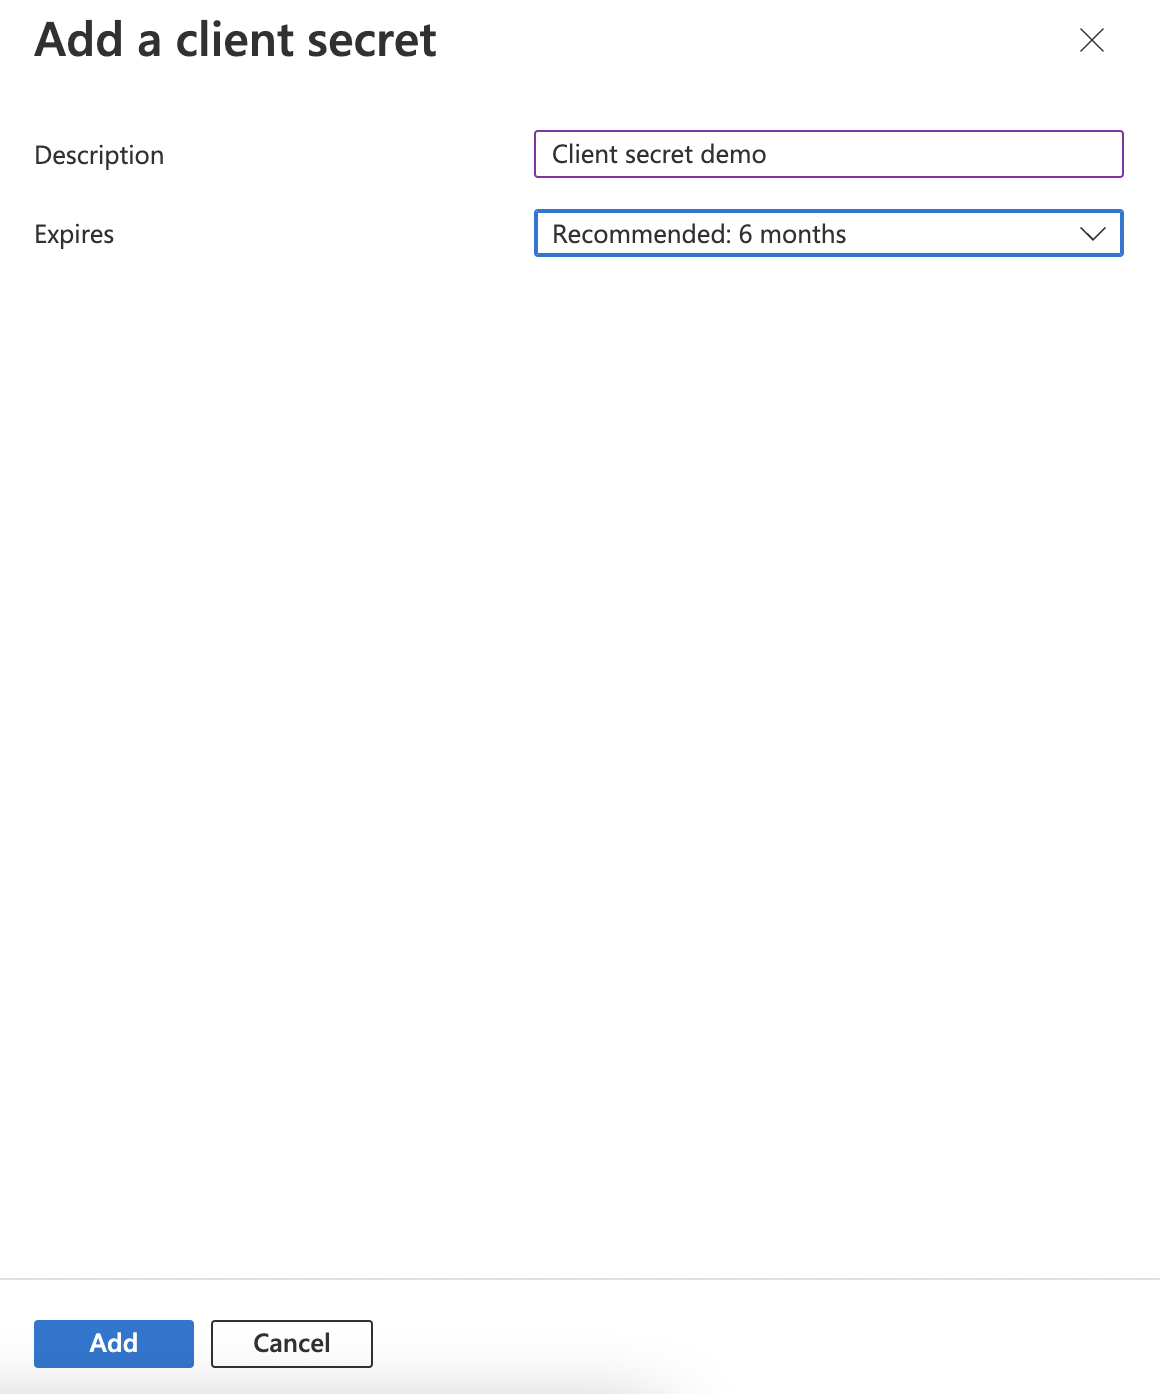
Add a client secret description and when will it expire. After that, click on Add.
When a client secret is created, you should see it on the list with all the details. Secret value can be found here and you need to copy it while you are on this page.
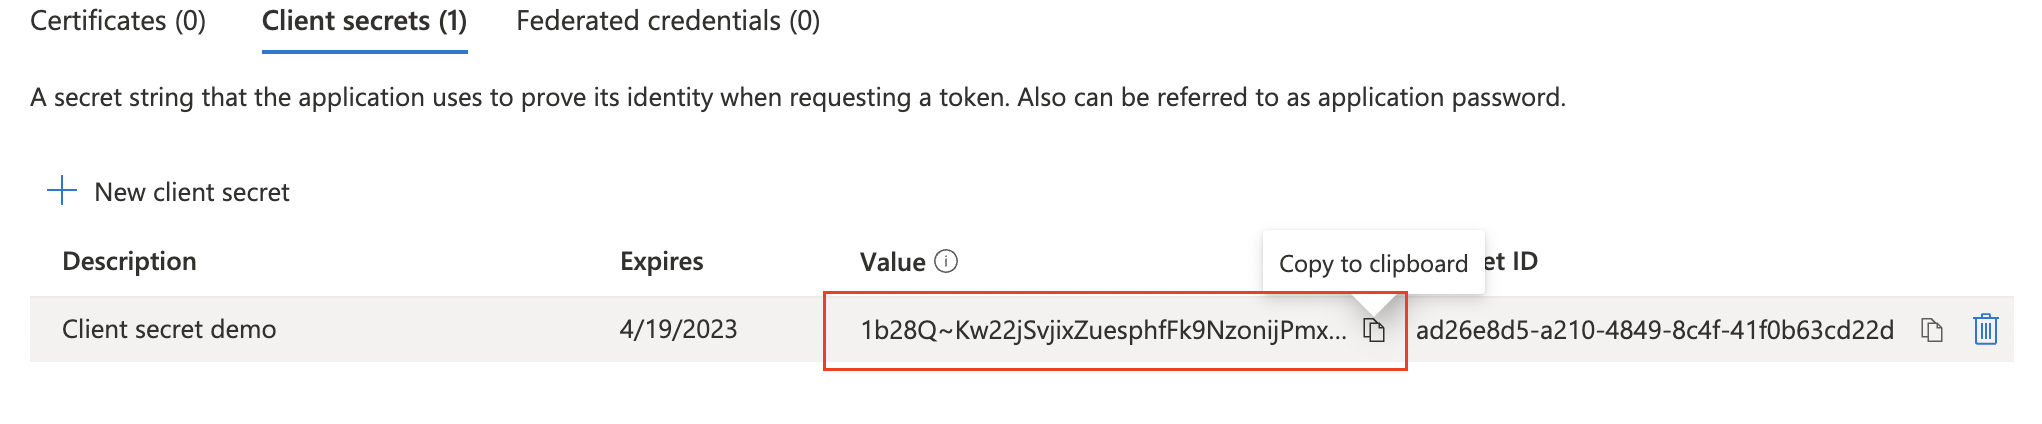
IMPORTANT: Client secret values cannot be viewed, except for immediately after creation. Be sure to save the secret when created before leaving the page.