How to create Sensitivity Labels to use for Data & More Copilot Privacy Protection
Introduction
Data & More Copilot Protection works in conjuction with Microsoft Purview to prevent Copilot (or any other AI technology) from accessing items containing privacy data or any other information that shouldn't be consumed by AI.
As a reminder, Copilot respects the permissions of the user running Copilot and can only access data that user has access to. That said, there are many situations where Copilot shouldn't have access to ALL the data the user has access to. There are also many situations where shared data either isn't or can't be proproperly secured to prevent Copilot from accessing the data.
In these situations, Purview sensitivity labels can be used to remove the Copy and extract content (EXTRACT) permission from the data, which is required by Copilot to access the contents of the item.
Prerequisites
1. Microsoft License Requirements
You must have a Microsoft 365 E5 license to create the Sensetivtiy lable that prohibits Co Pilot from acces data AND all user must at lesat have a E3 license that includes Microsoft Information Protection (MIP) capabilities.
2. Access to the Microsoft Purview Compliance Portal
You must have permissions to access the Microsoft Purview Information Protection portal in Azure.
3. Azure Permissions
Your account must be assigned the necessary permissions in Azure to create and manage sensitivity labels. For this, you must be a member of a group that's granted the Sensitivity Label Administrator permission. By default, these roles have that permission:
- Compliance Data Administrator
- Organization Management
- Security Administrator
4. Data & More License Requirements
You must be licensed for the Copilot Protection module of Data & More.
5. Data & More Permissions
Your account must have admin permissions in Data & More to confirm the app registration permissions are set correctly and the labels have been published so the Data & More software can use them.
Creating the Sensitivity Label
To get started, browse to admin.microsoft.com and log in. In the left-hand navigation, click on Show all to display the Admin centers then click on Microsoft Purview to launch the Microsoft Purview portal. In the Microsoft Purview portal, click Information Protection.
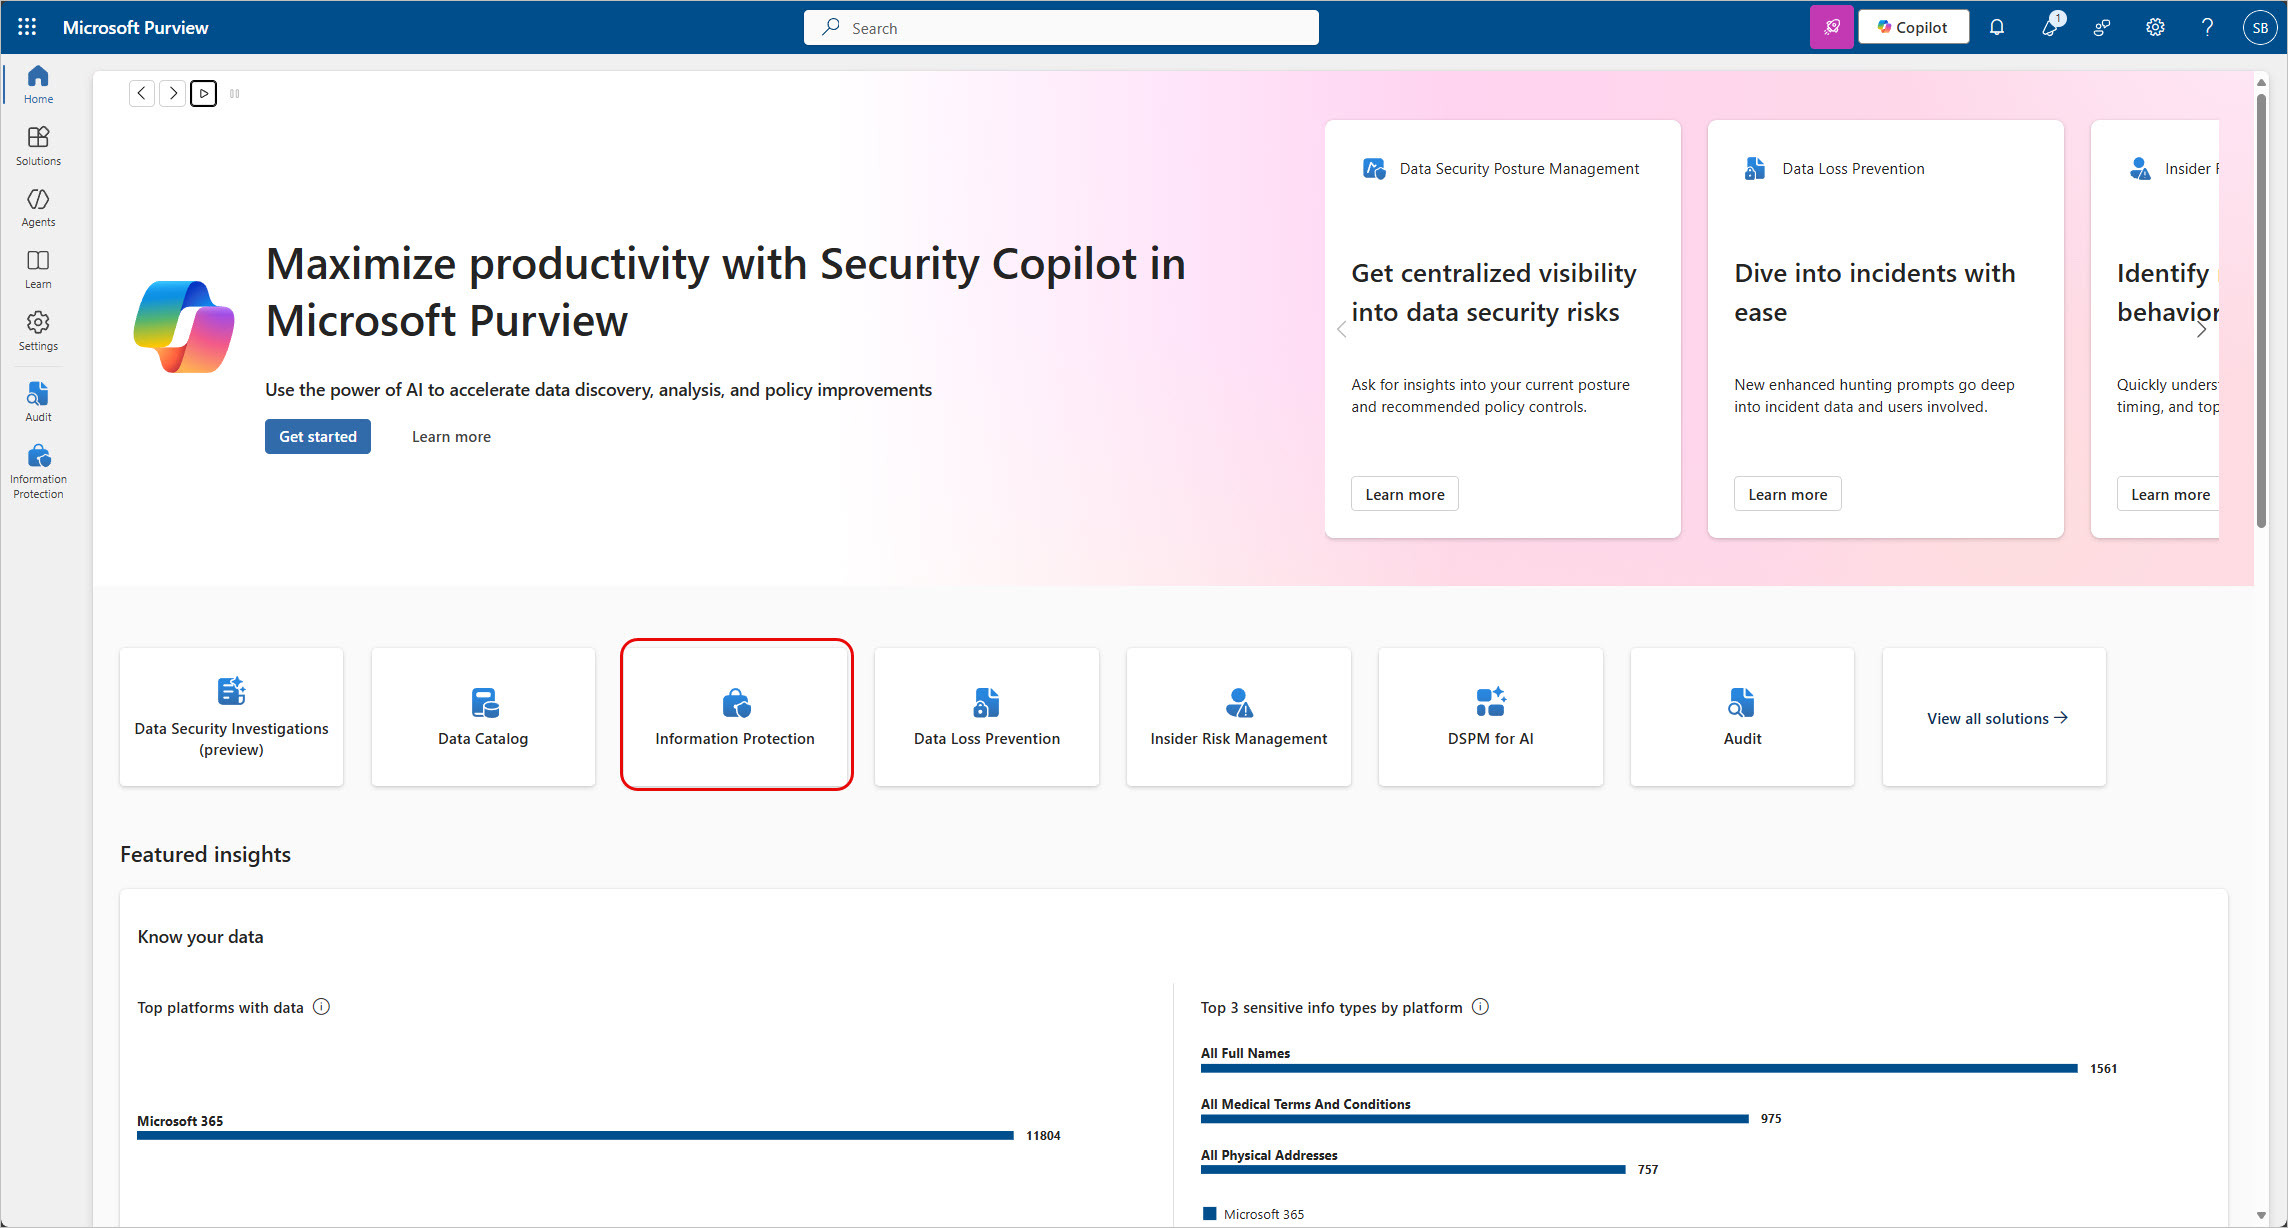
In the Information Protection screen, click Sensitivity labels in the left hand navigation, then click Create a label to launch the label creation wizard.
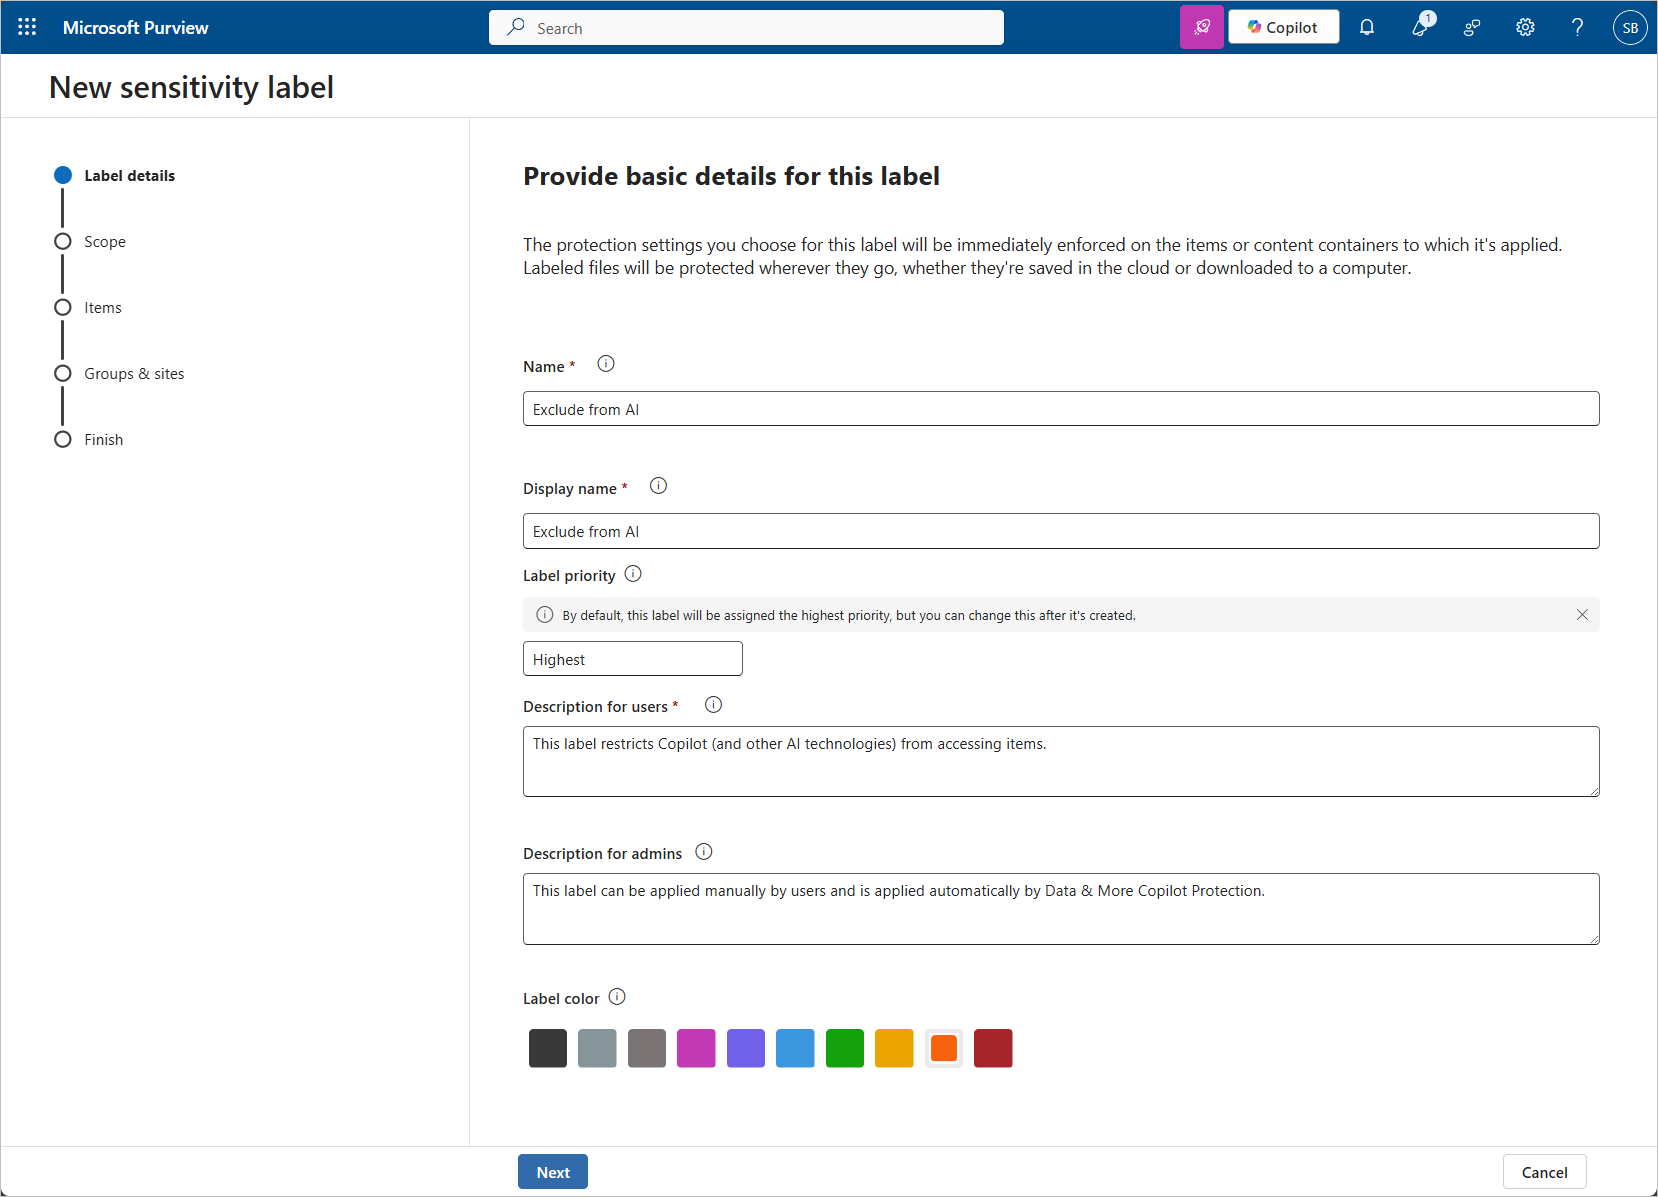
Specify the name, description, and color for the new label. In the example shown, the label is called Exclude from AI.
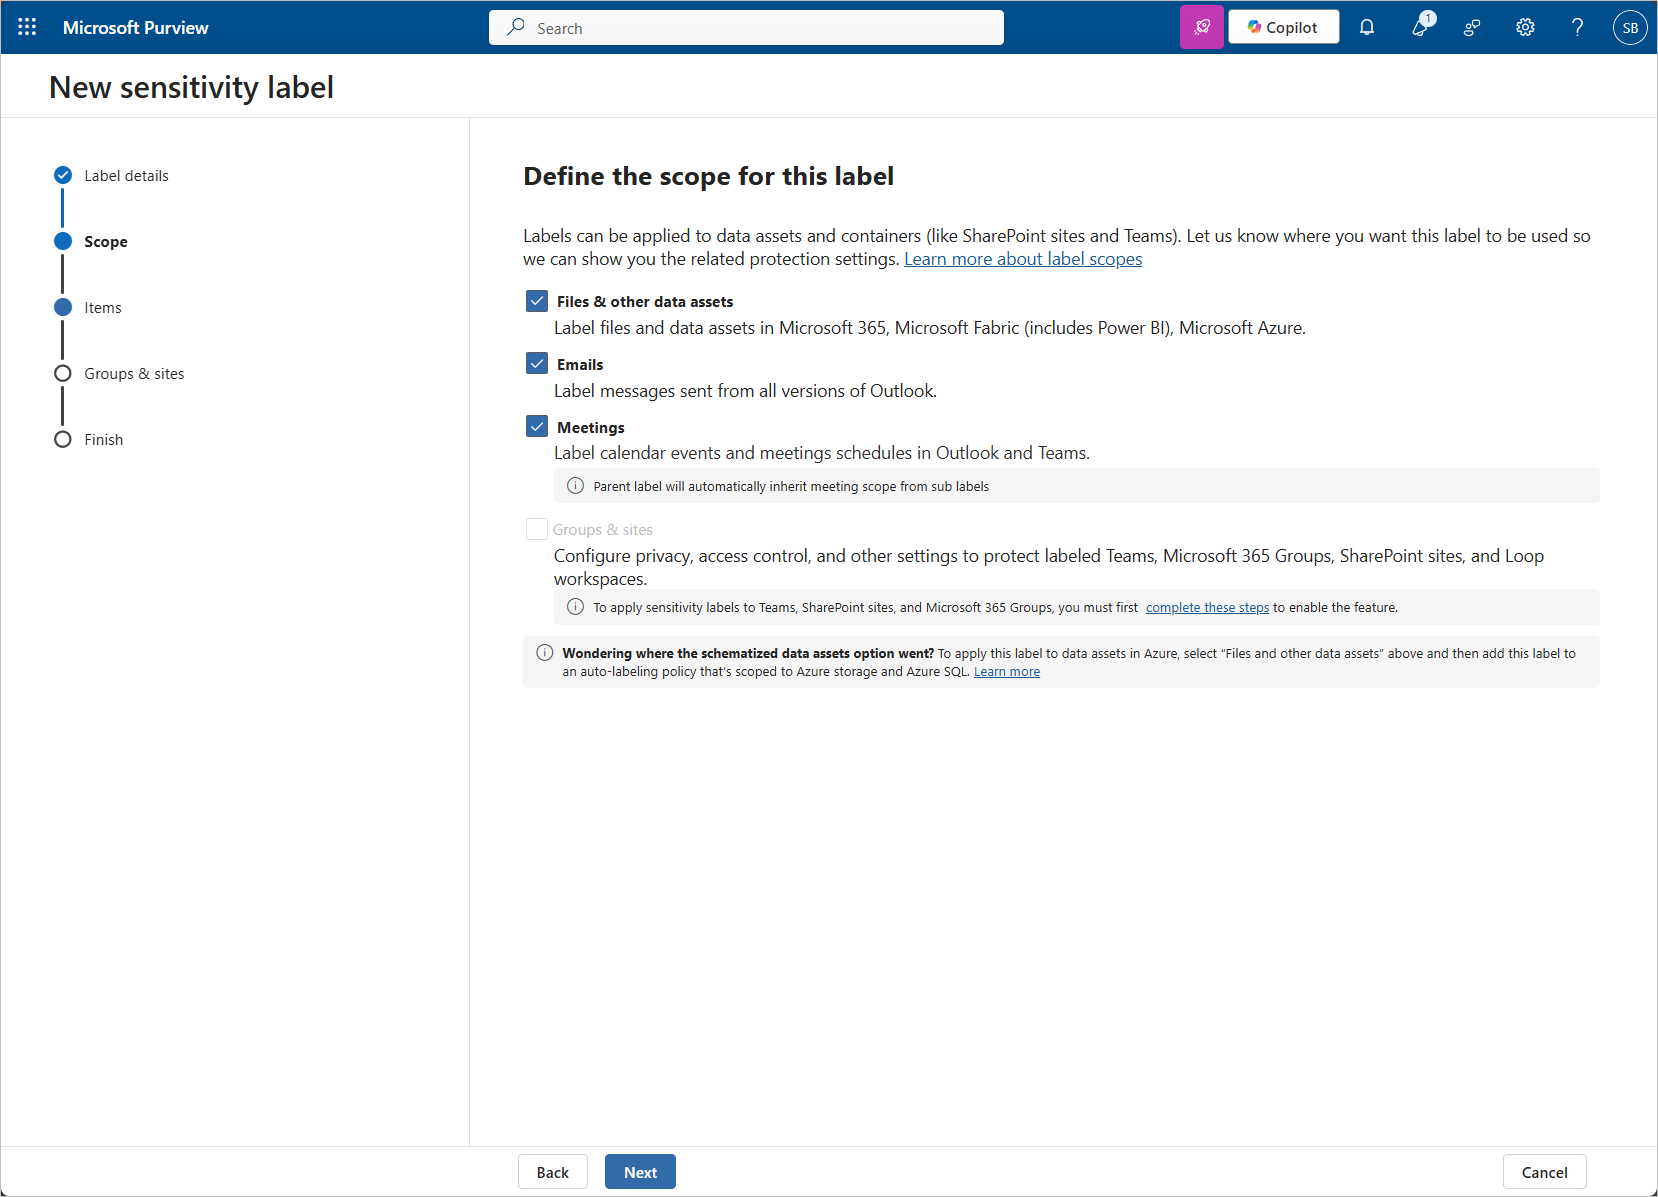
Specify the scope for the new label by indicating which items it can be applied to.
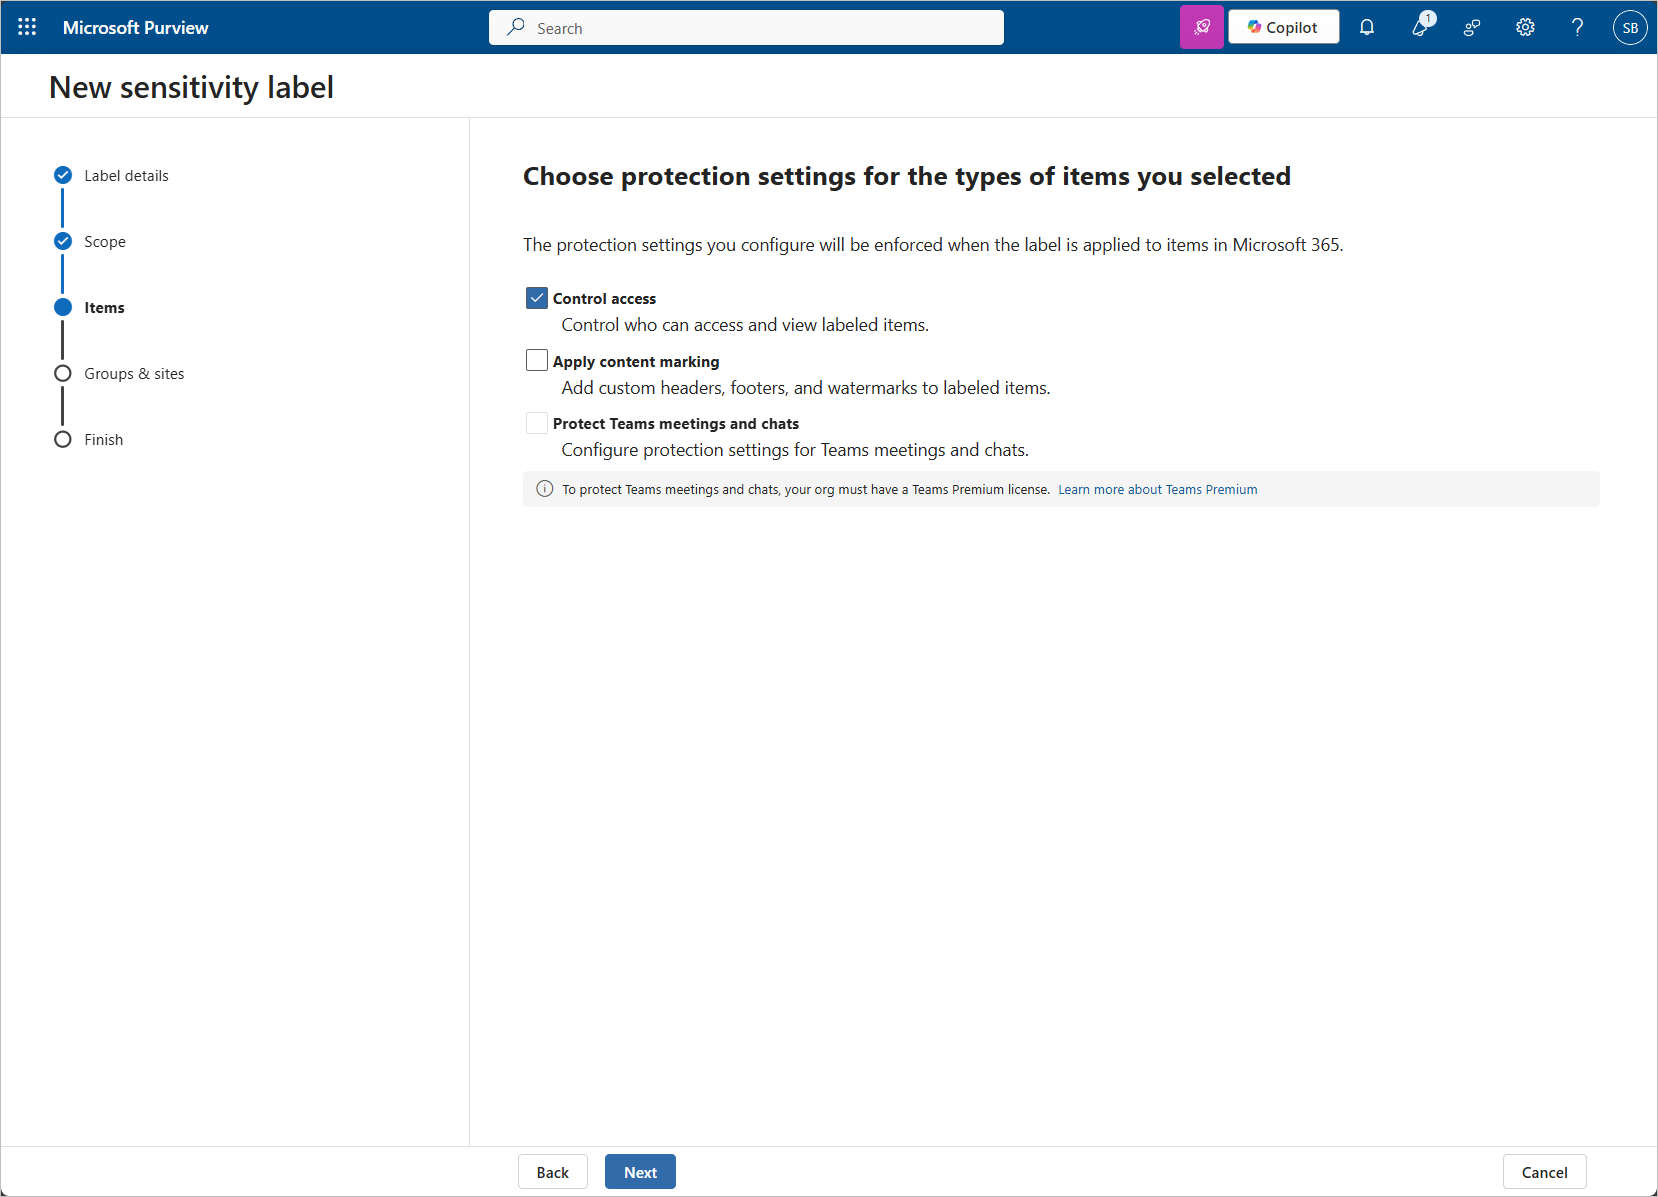
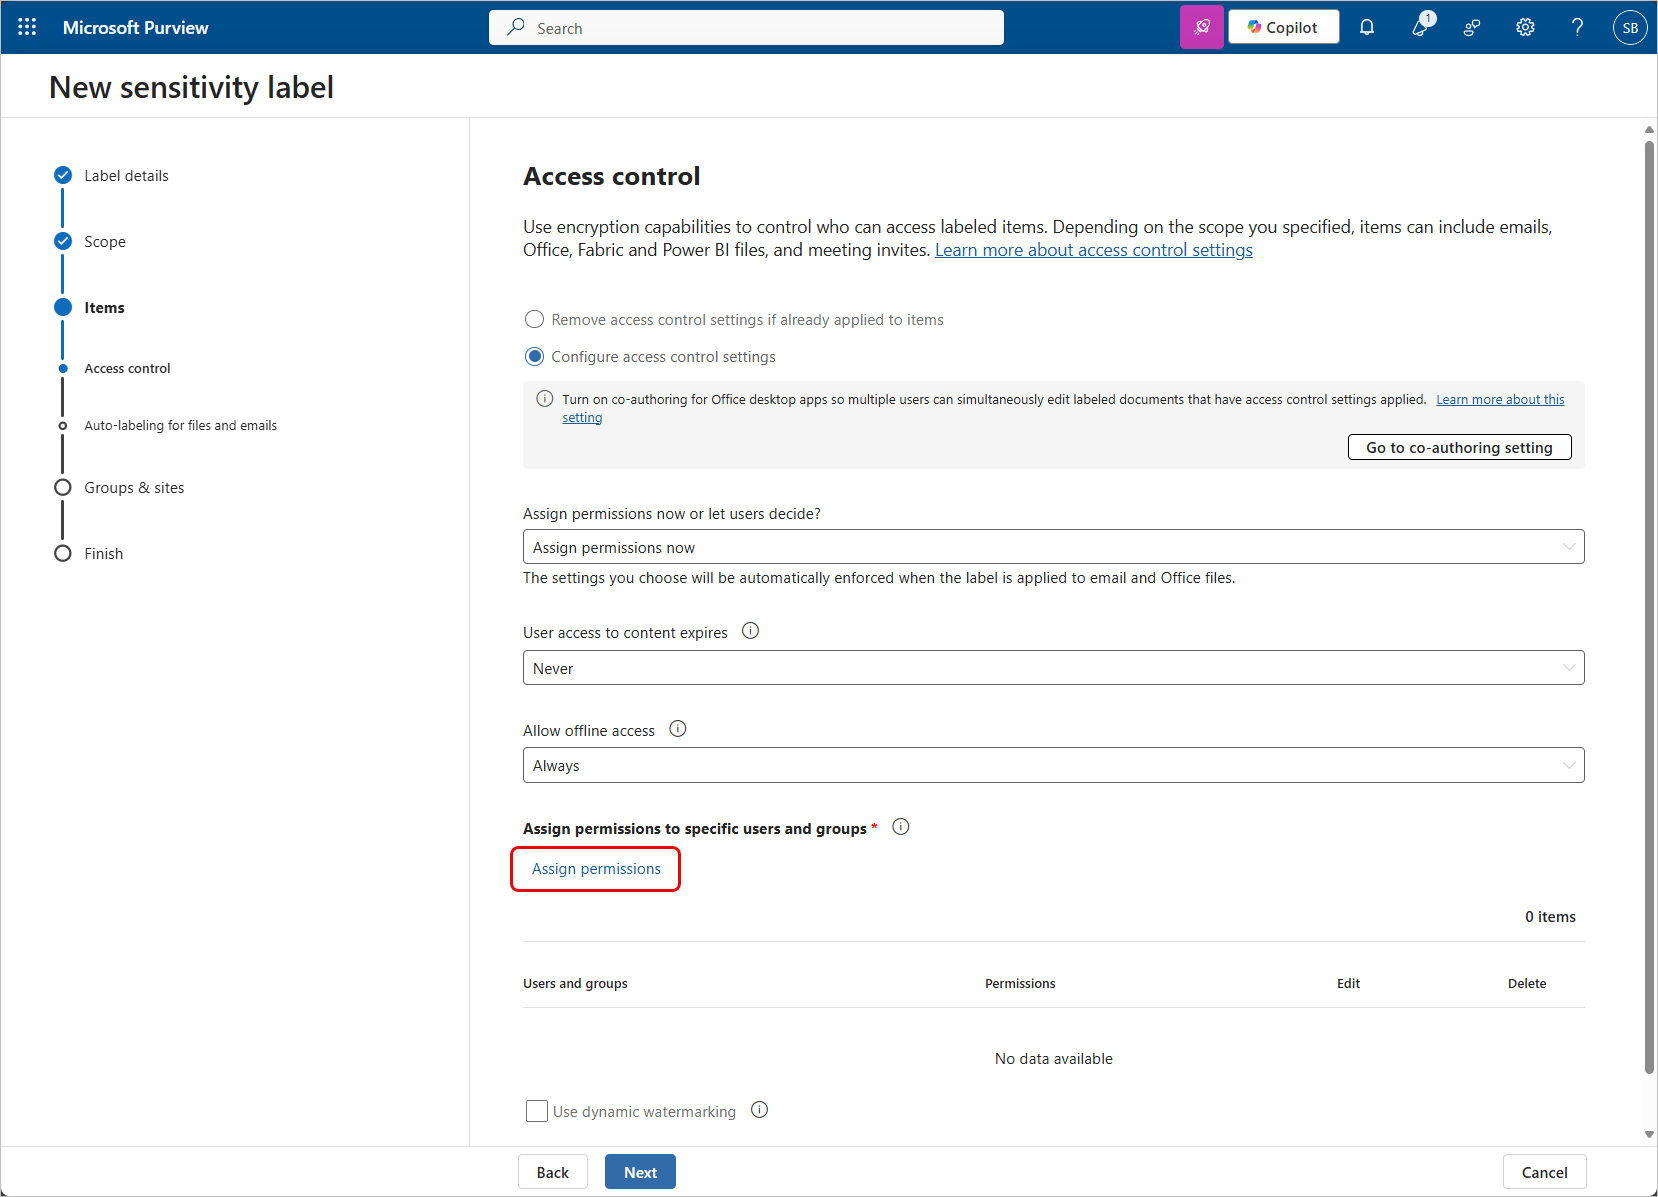
The key to creating a label for Copilot privacy protection is to specify the permissions applied to labelled items. To configure custom permissions, select the Control access option.
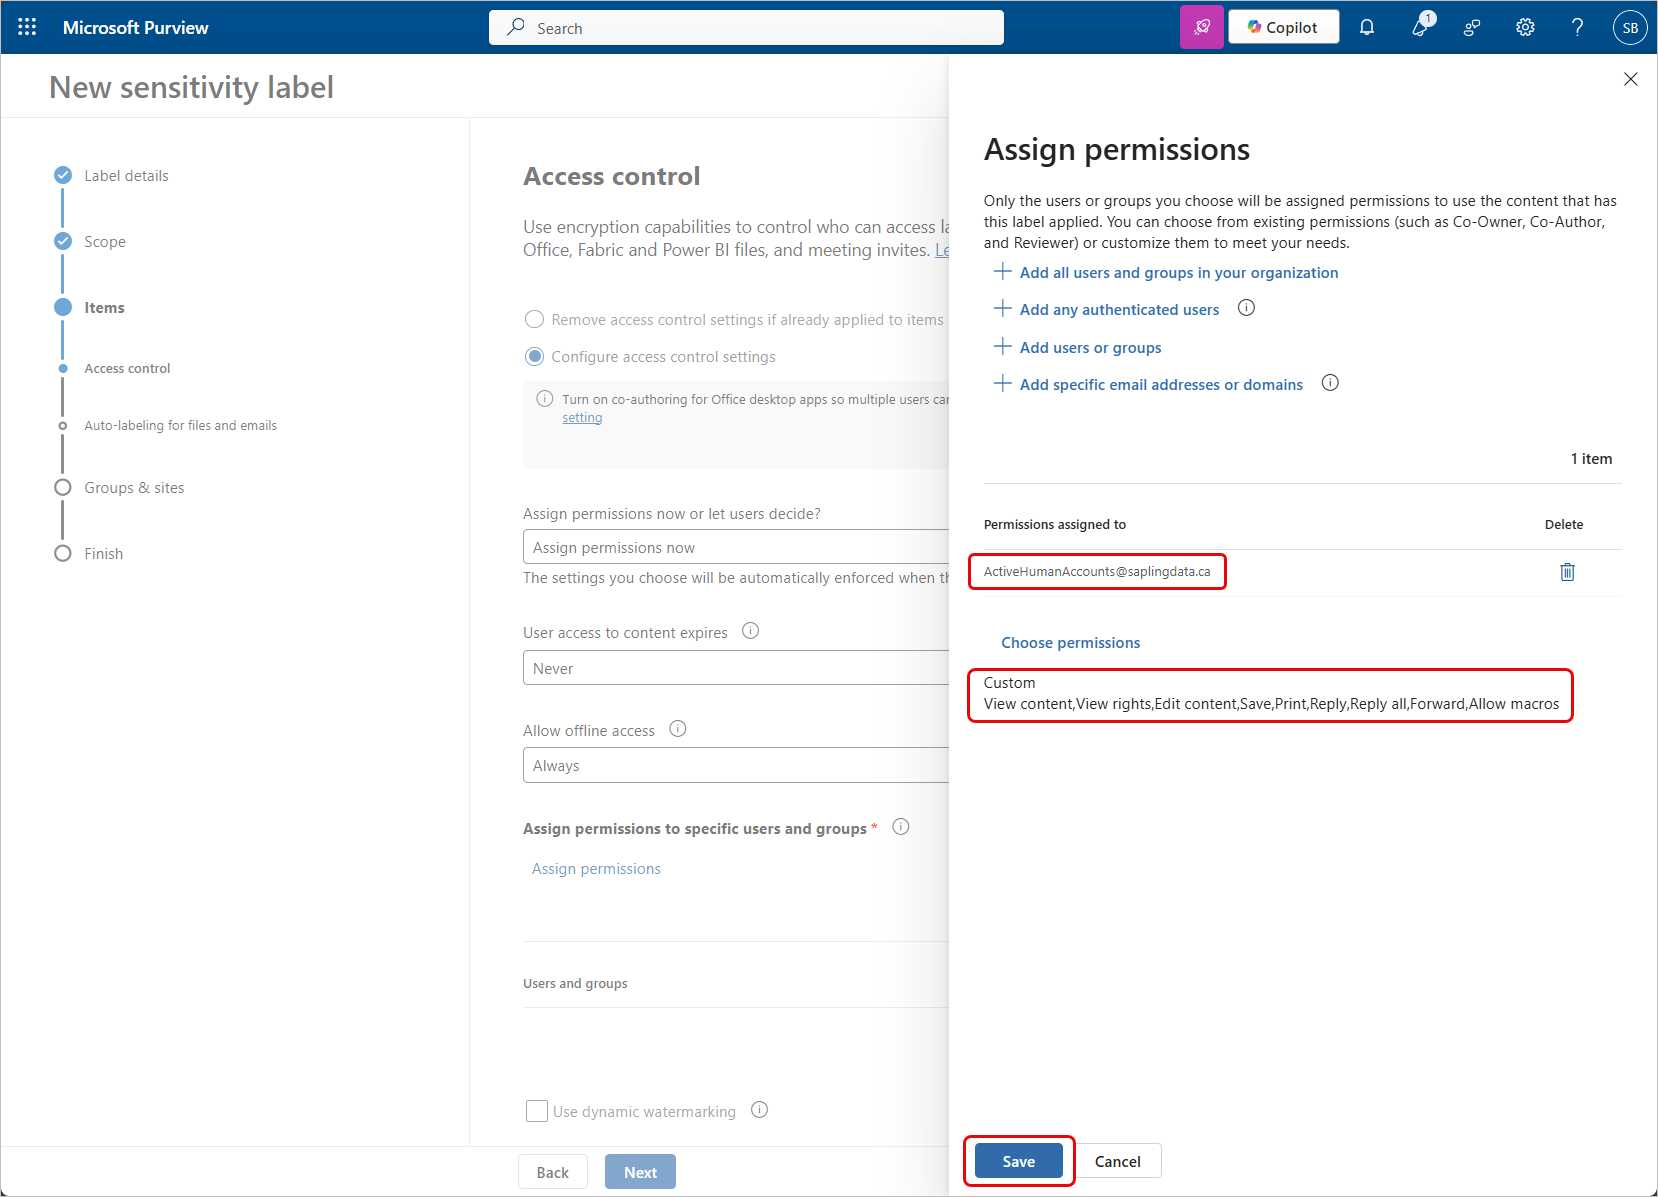
Select the Assign permissions option to configure the permissions associated with this label.
Use the Add users or groups option to select the group (or set of users) to be assigned.
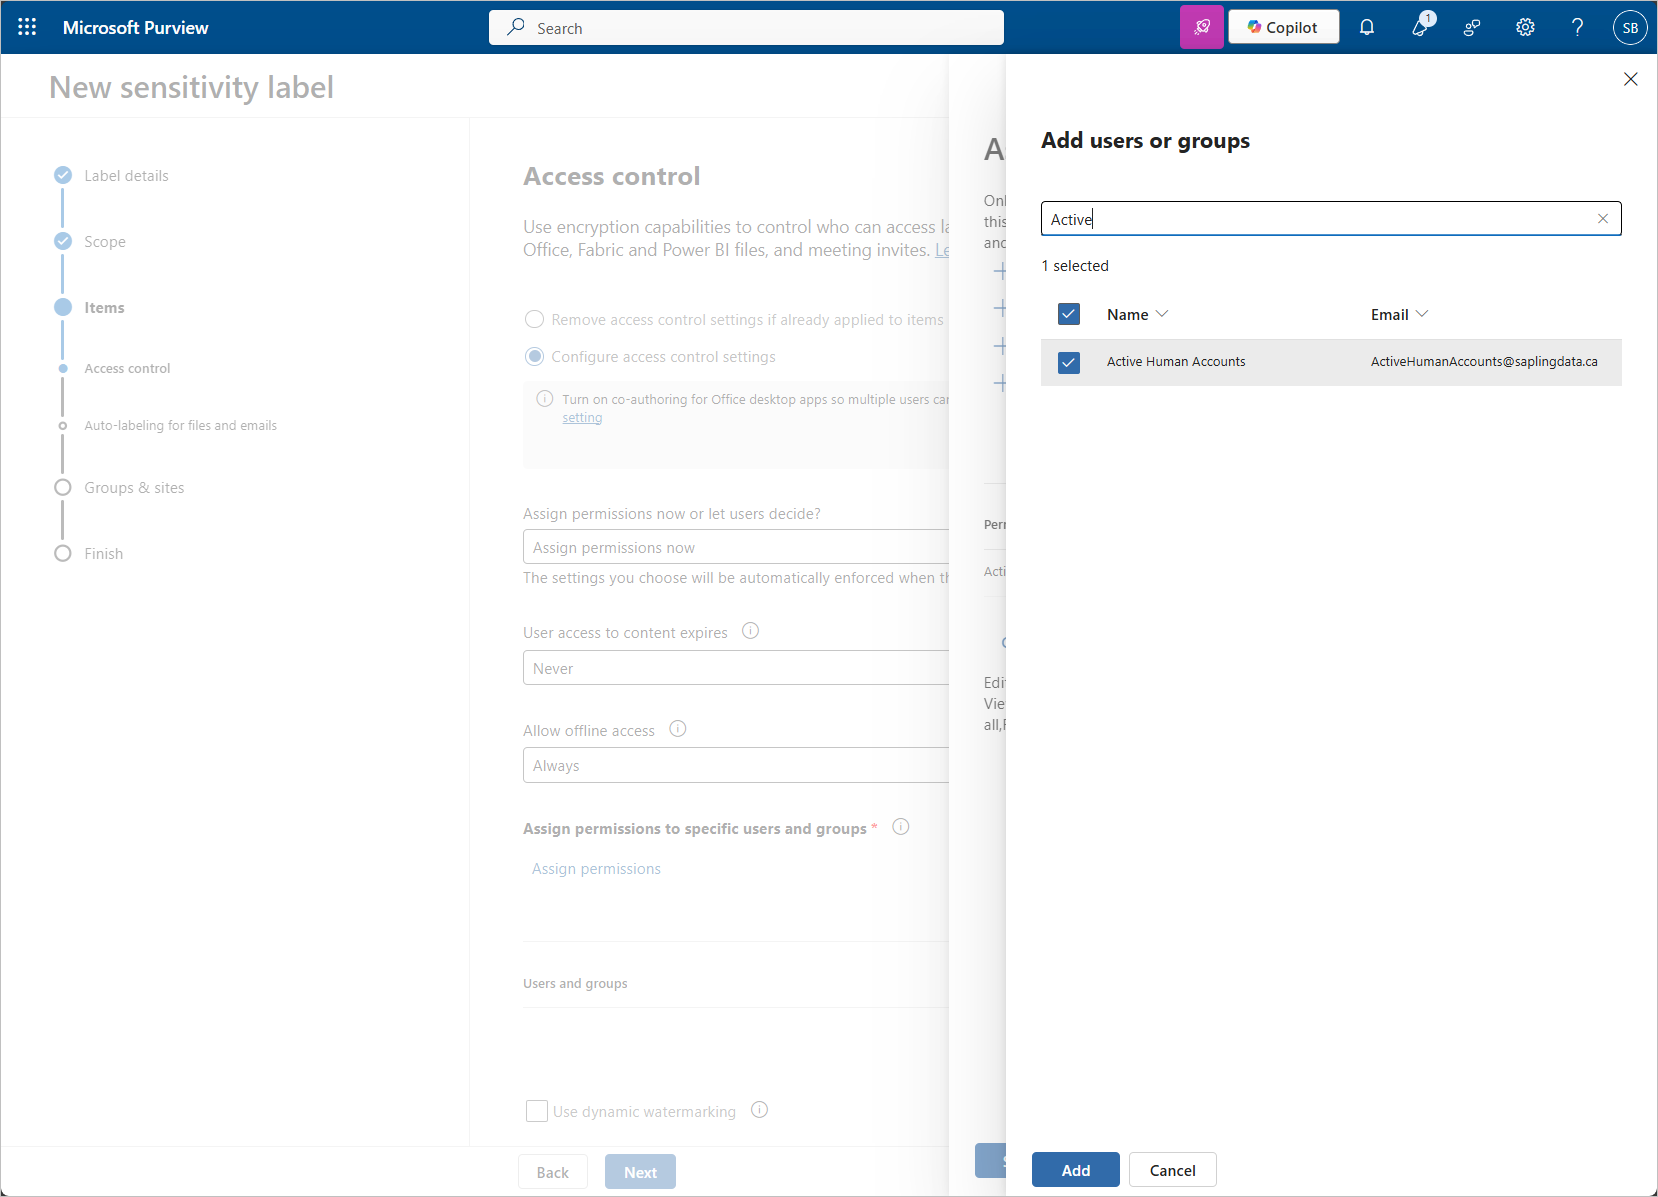
When configuring the access control, any combination of users and groups can be used, however, the recommendation is to use a dynamic Microsoft 365 group, configured to contain only enabled accounts that have been assigned to humans.
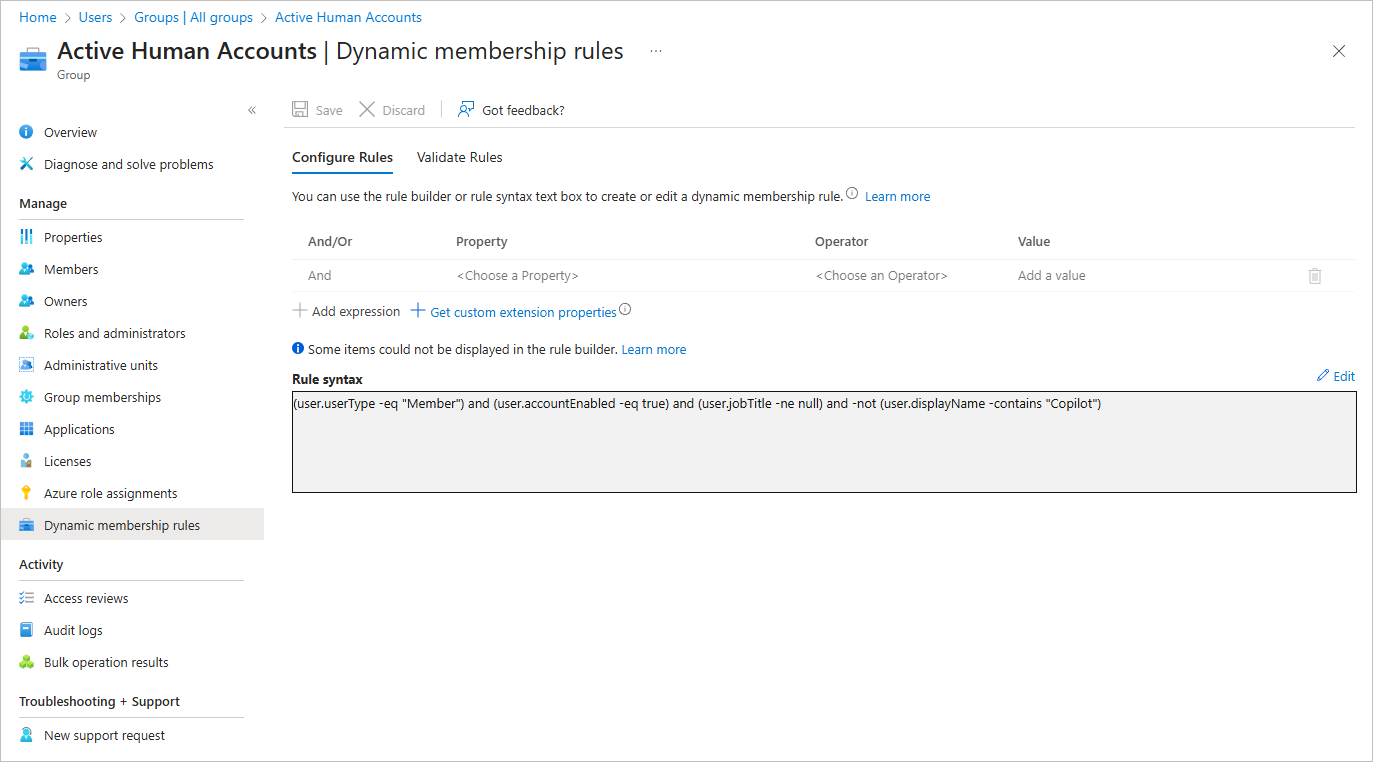
The example shown uses a dynamic Microsoft 365 group called Active Human Accounts and here's the selection logic used to set the membership for this group.
Once a group (or set of users) have been selected, use the Choose Permissions option and the Custom profile from the drop-down list to specify the level of permissions. Ensure the Copy and extract content permission is left deselected.
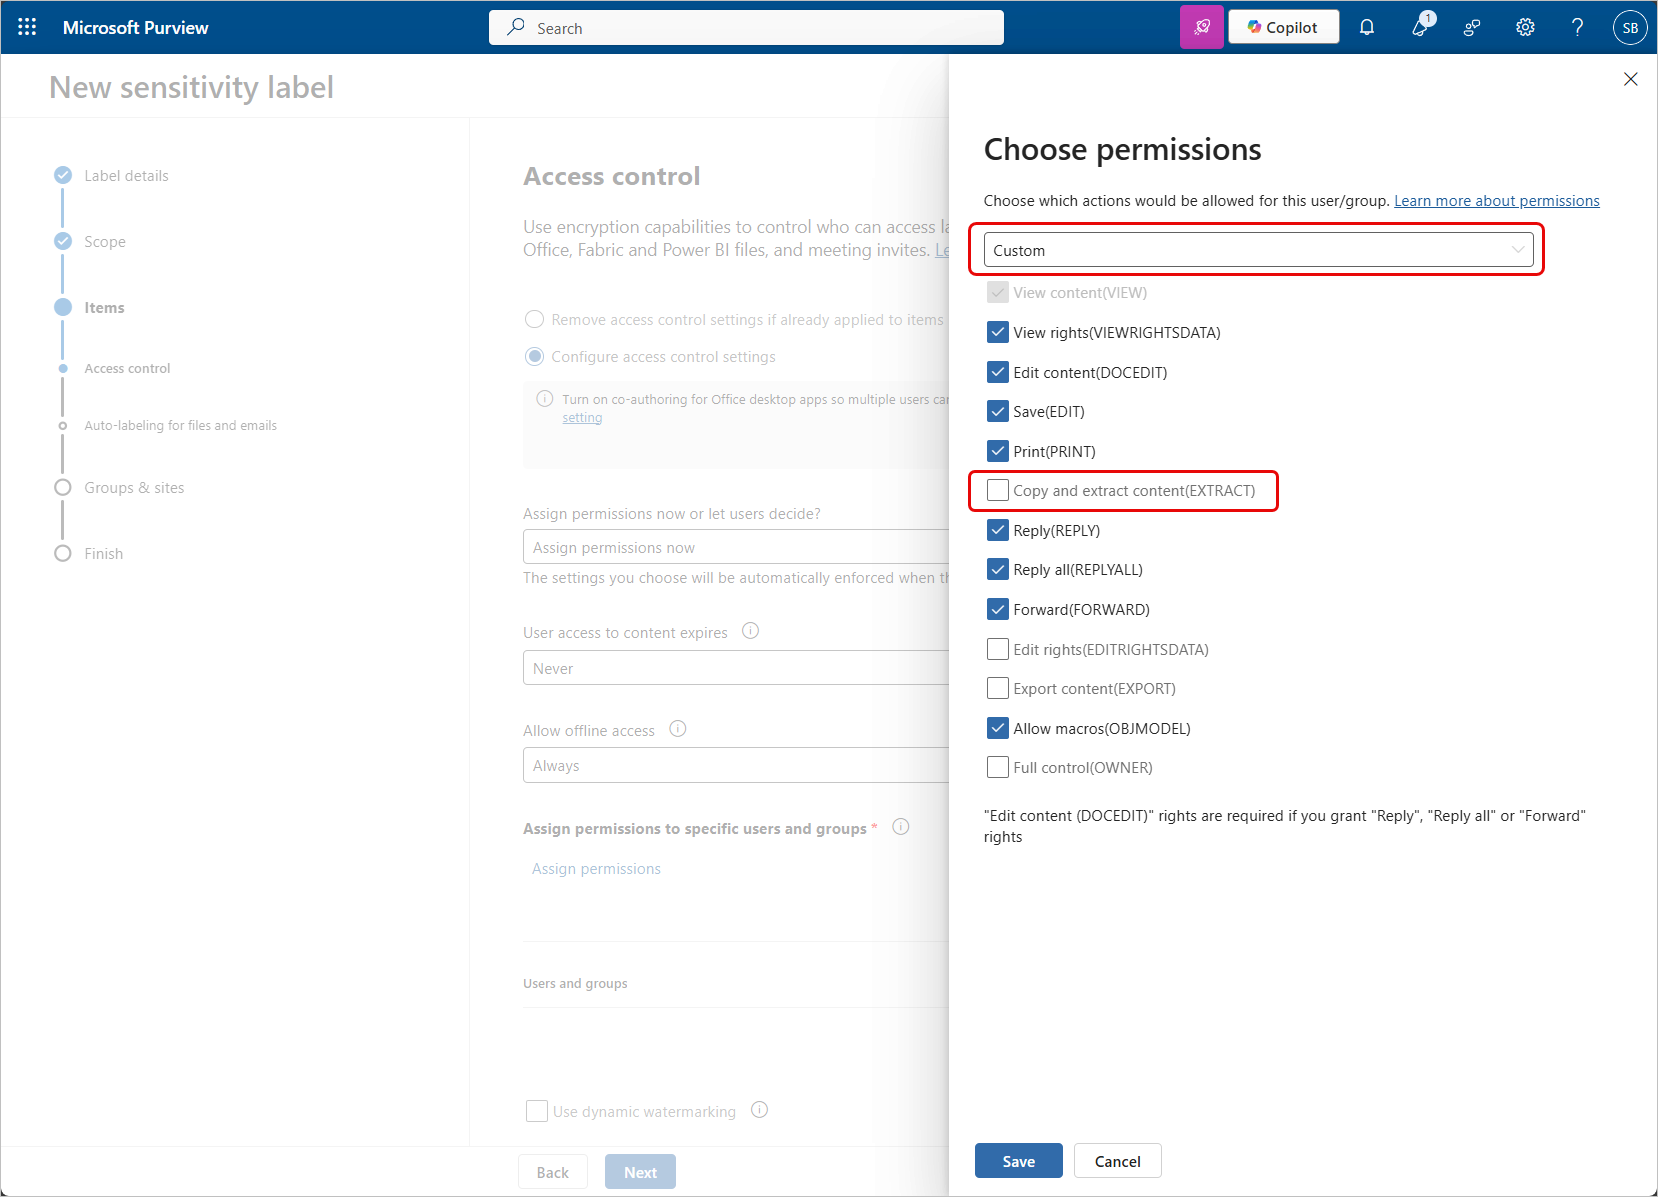
When configuring the permissions, any set of permissions can be used, however, the recommendation is to use the same set of permissions as the Editor role, excluding the Copy and extract content permission.
Once the permissions have been set, confirm the selected group (or set of users) and permissions are displaying properly on the Assign permissions screen and click Save to apply the change.
Set the auto-labelling for files and email.
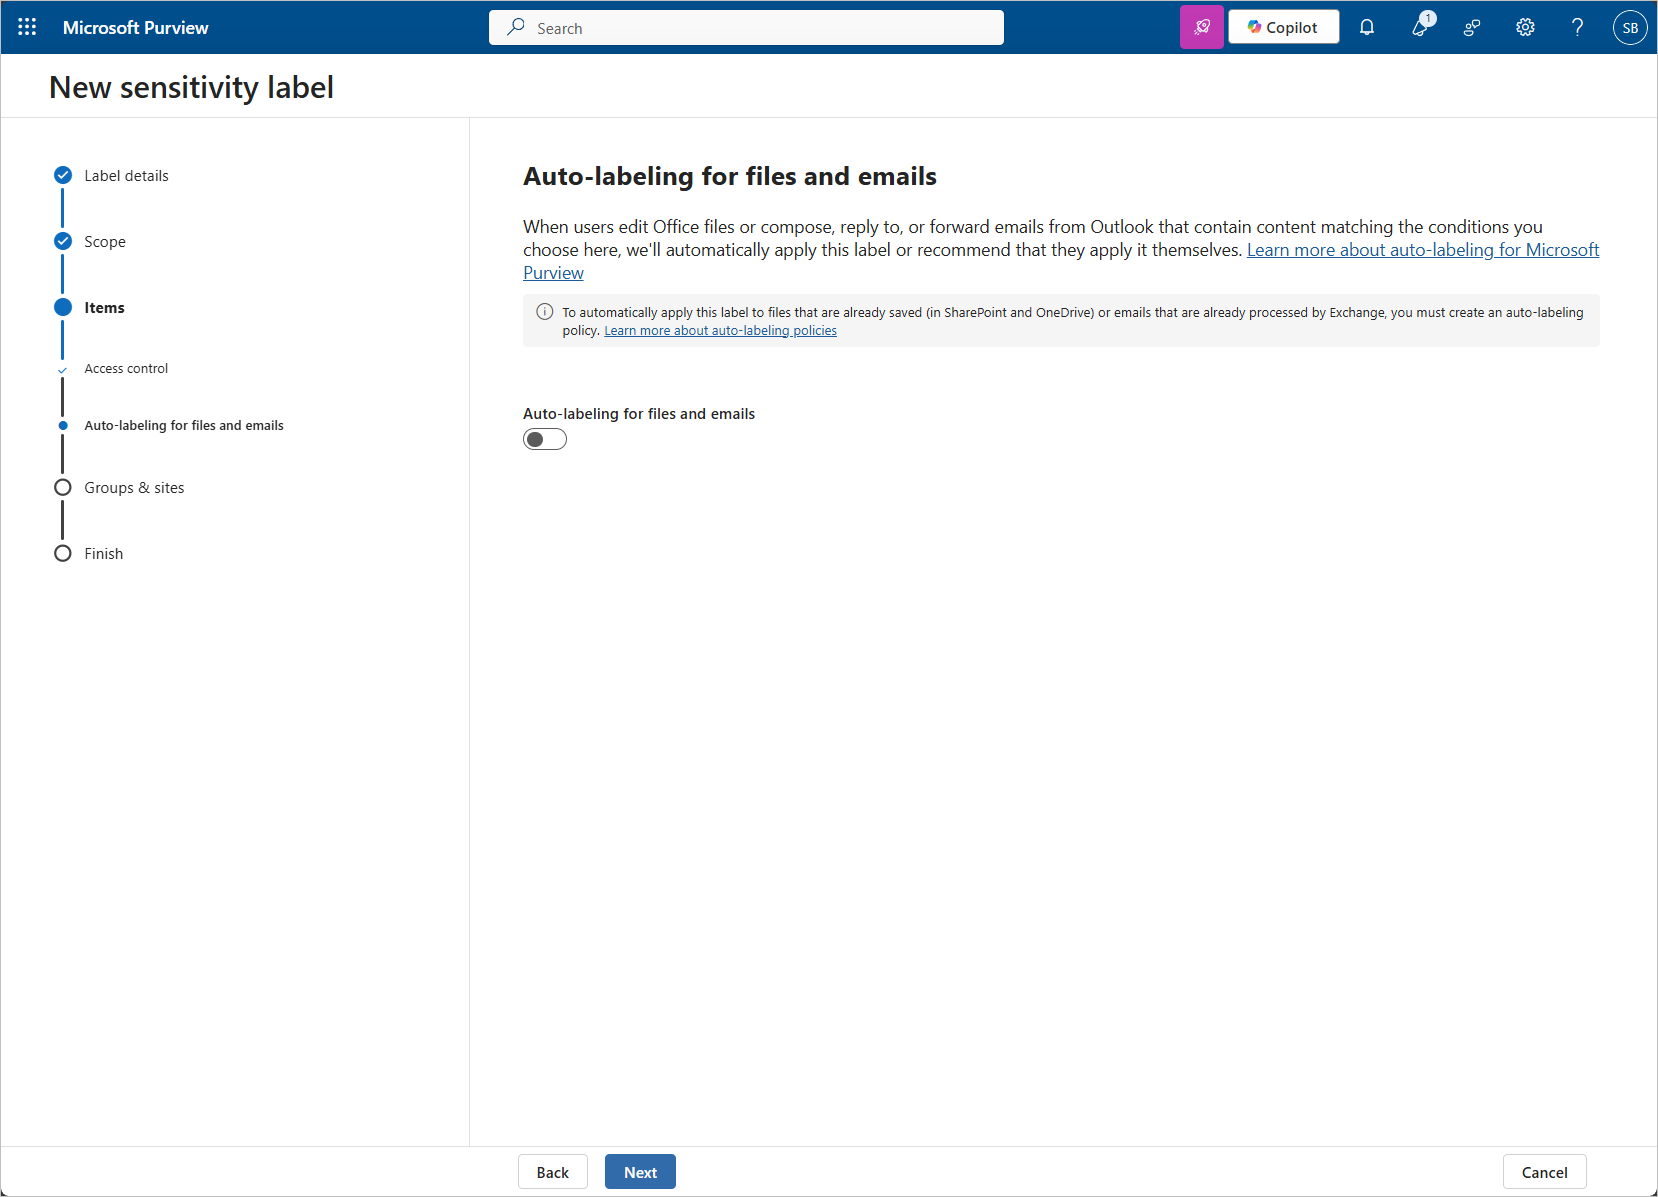
Microsoft's auto-labelling is extremely inaccurate so the recommendation is to leave auto-labelling disabled and leverage Data & More Copilot readiness to apply the new label to the content that needs it.
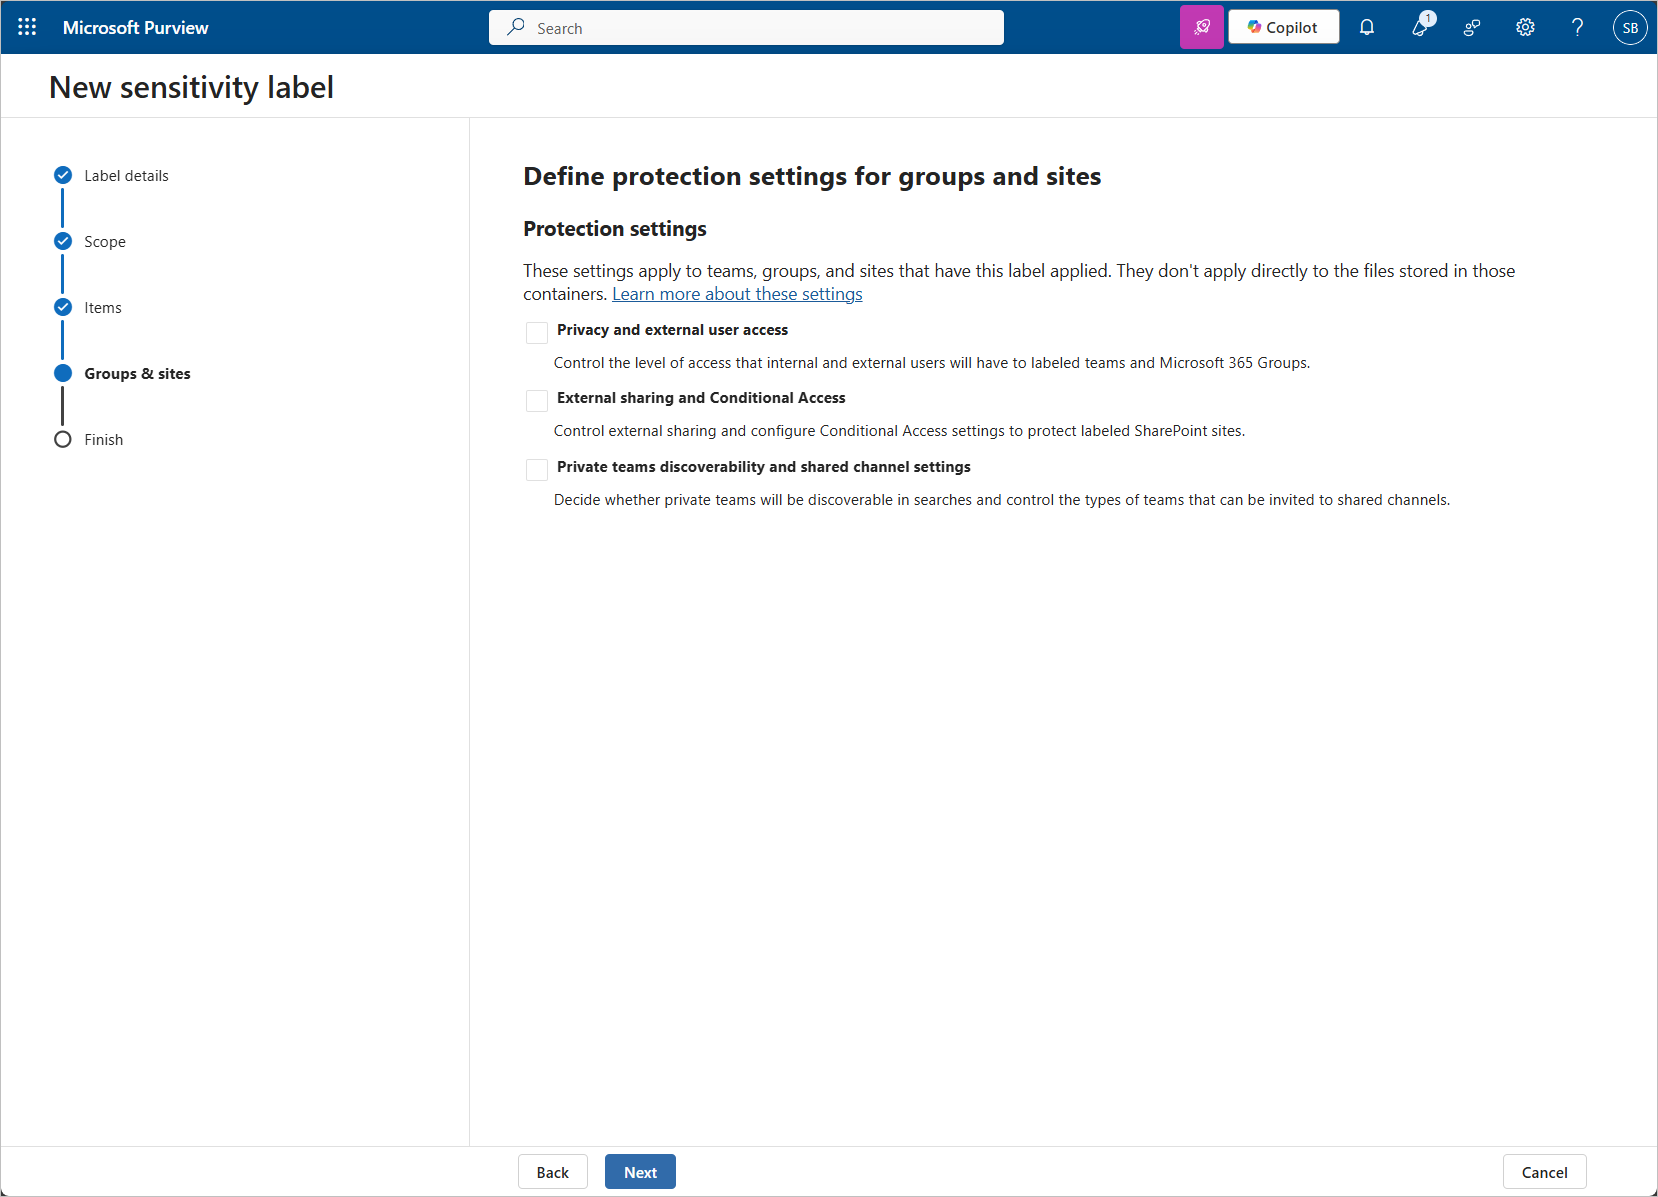
Additional protection settings can be assigned if you'd like to apply further protection to items with this label. None of these settings are required to prevent Copilot access to data so they should only be enabled to address additional business requirements or scenarios.
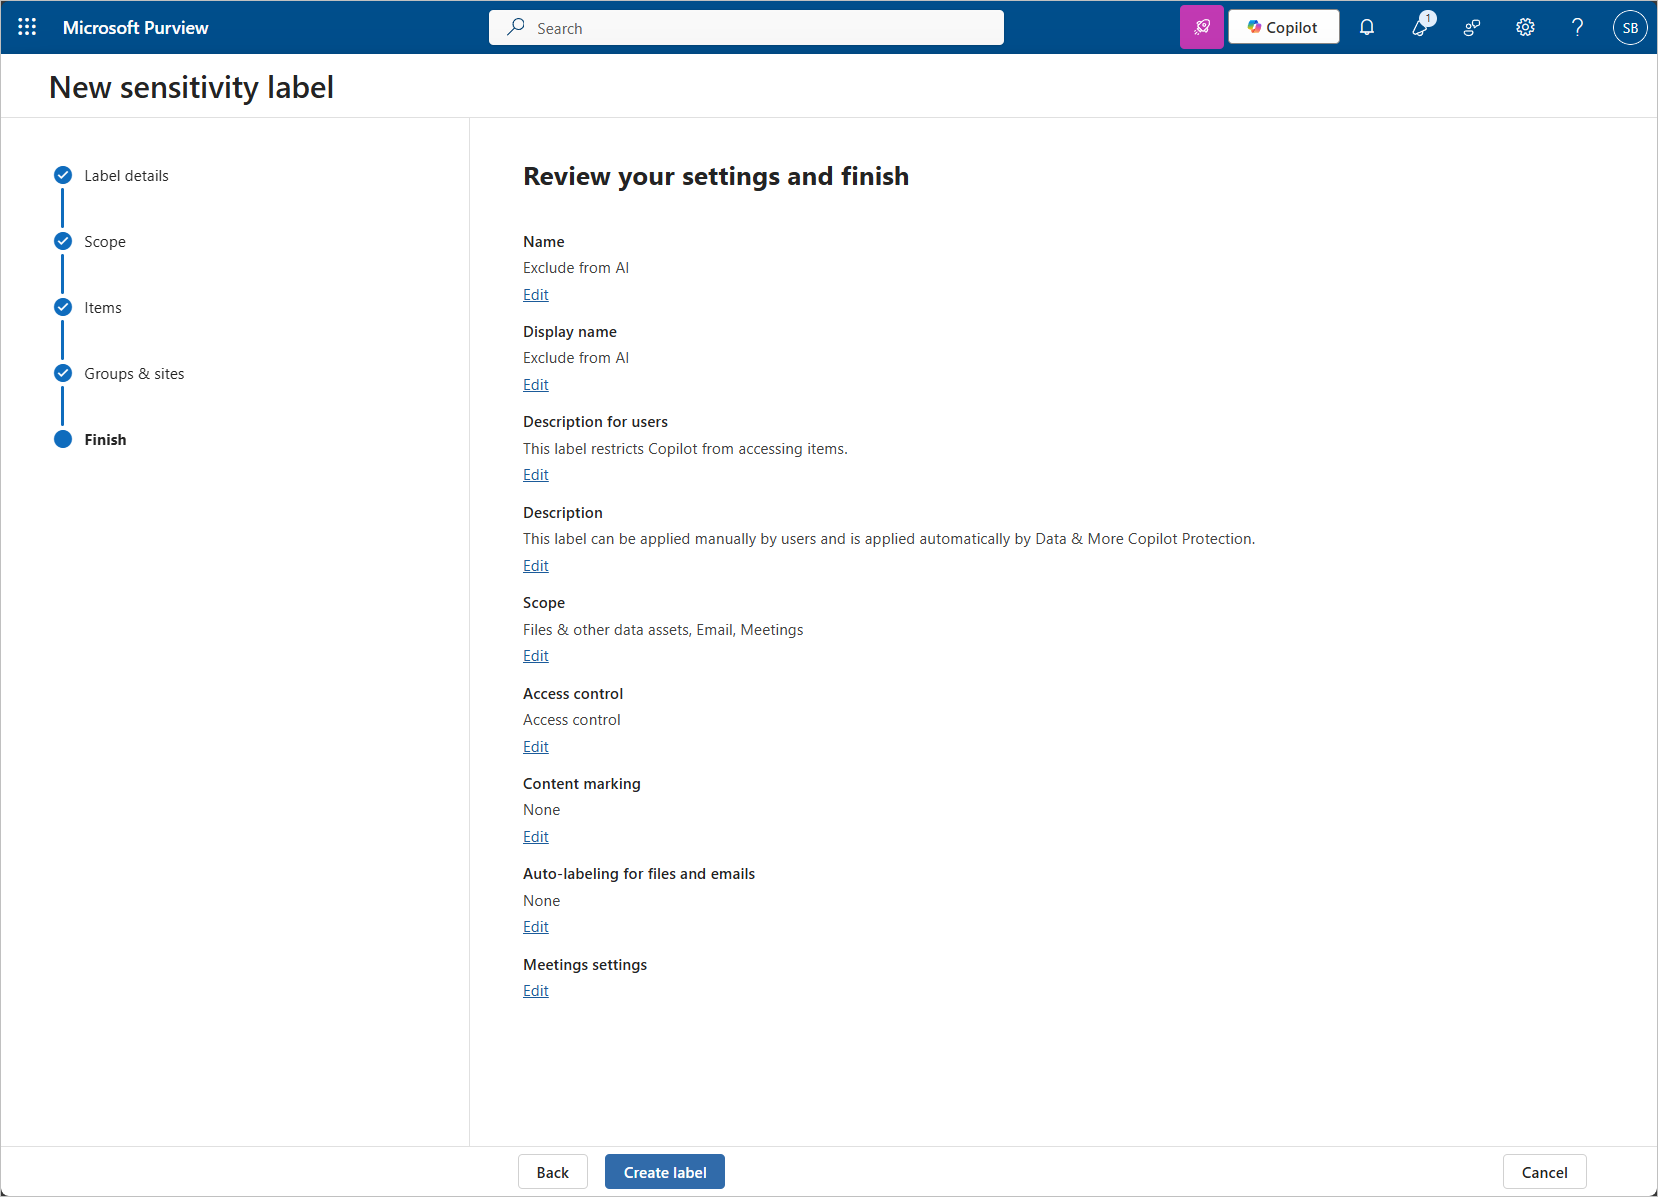
Conduct a final review of the settings and click the Create label button.
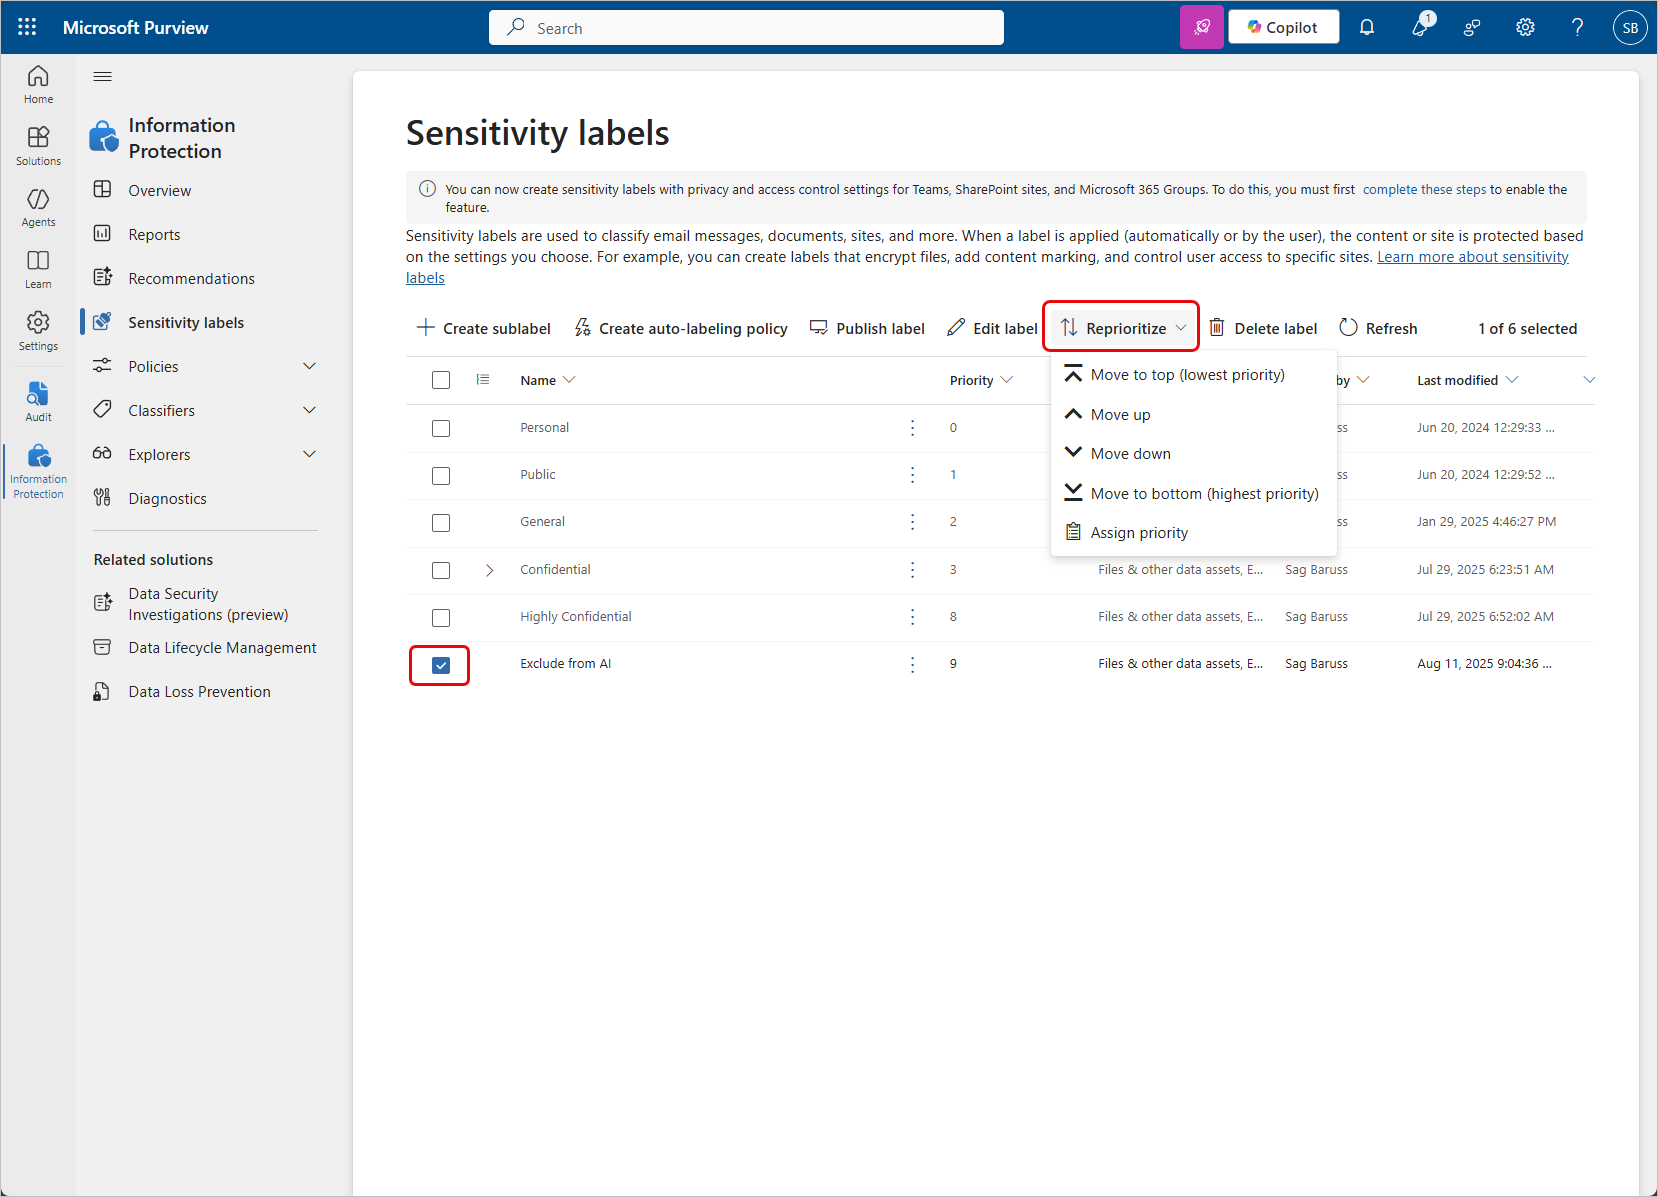
The new label will now appear in the hierarchy of sensitivity labels. By default, the new label will be crated with the highest sensitivity - be sure to adjust the sensitivity to the appropriate level if you have other labels in your environment.
Publishing the Sensitivity Label
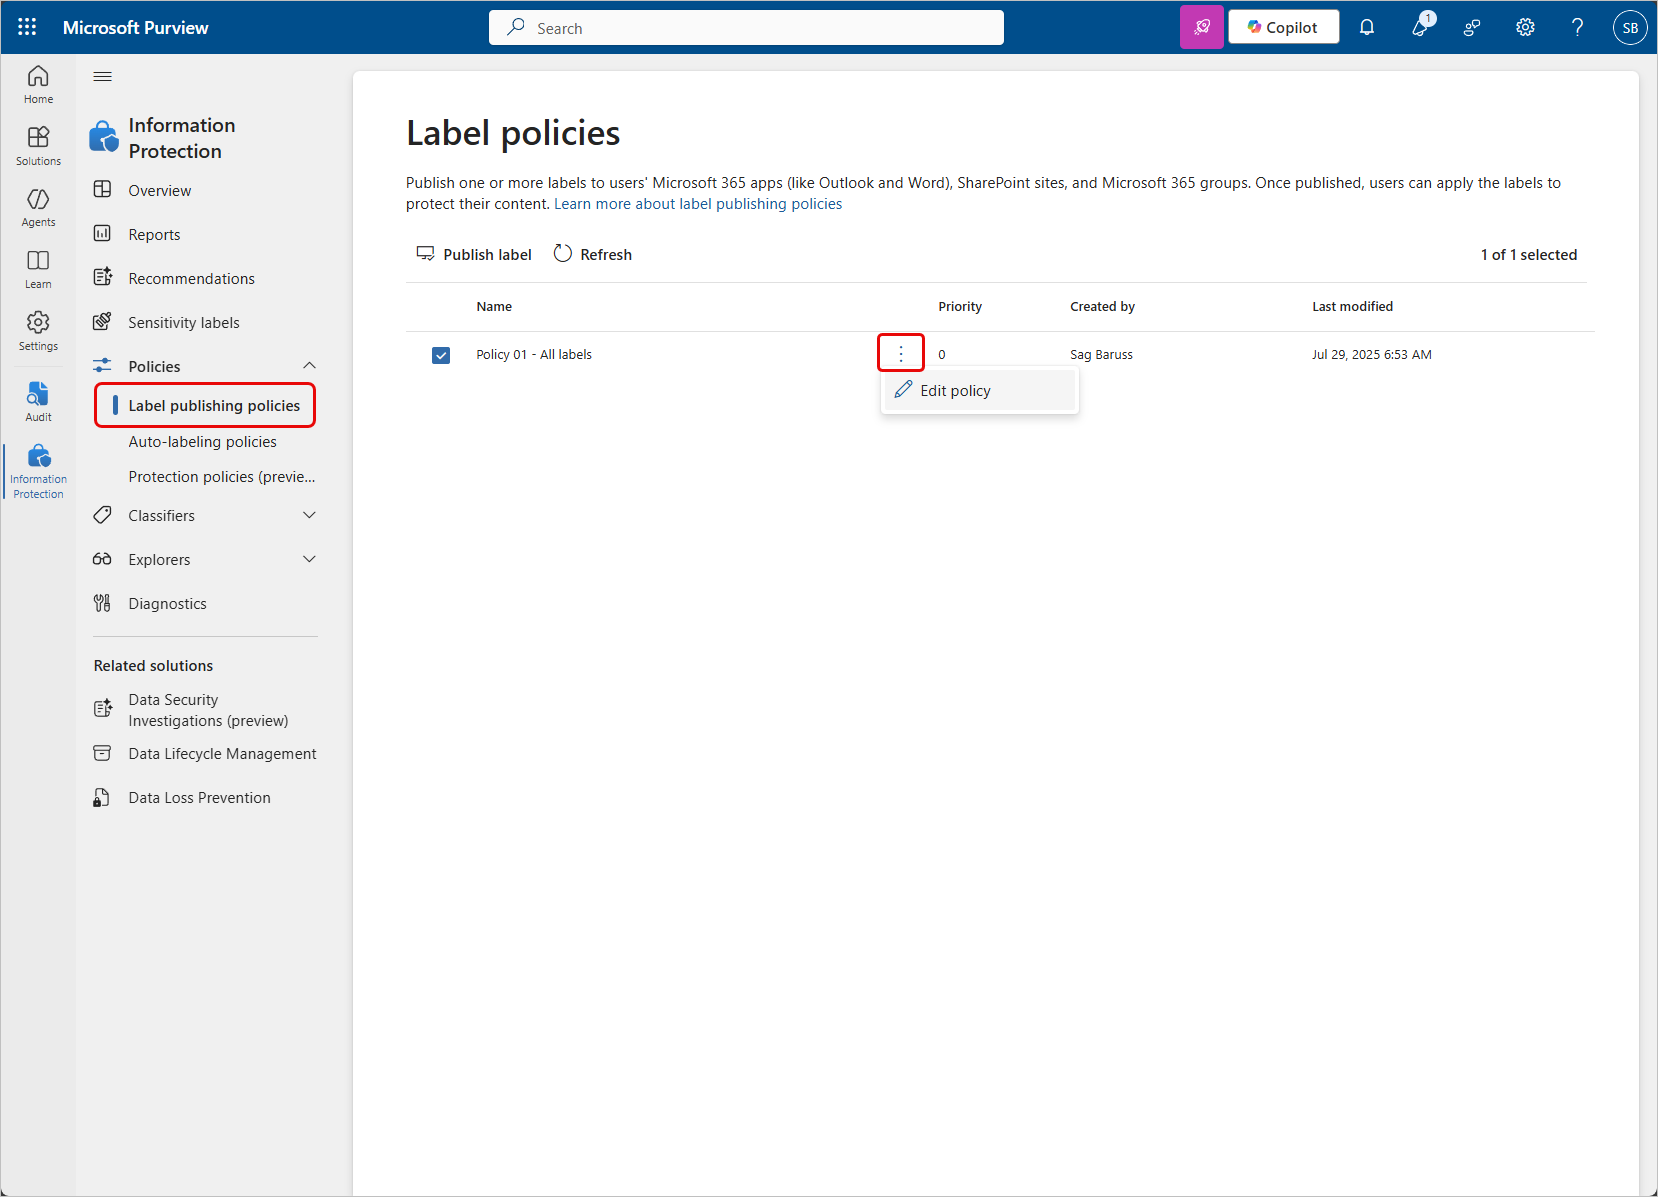
Before the new label can be used it needs to be published. To begin, in the left-hand navigation of the Purview Information Protection screen, expand Policies and click Label publishing policies. This will display the list of publishing policies.
If this is the first label in your environment, a new publishing policy is required. If there are already published labels, the new label can either be added to an existing policy or published through a new policy. If custom settings are required for this label, a different policy is required. If using the same settings, for simplicity, the recommendation is to modify the existing policy.
To modify an existing policy, select the Edit policy action.
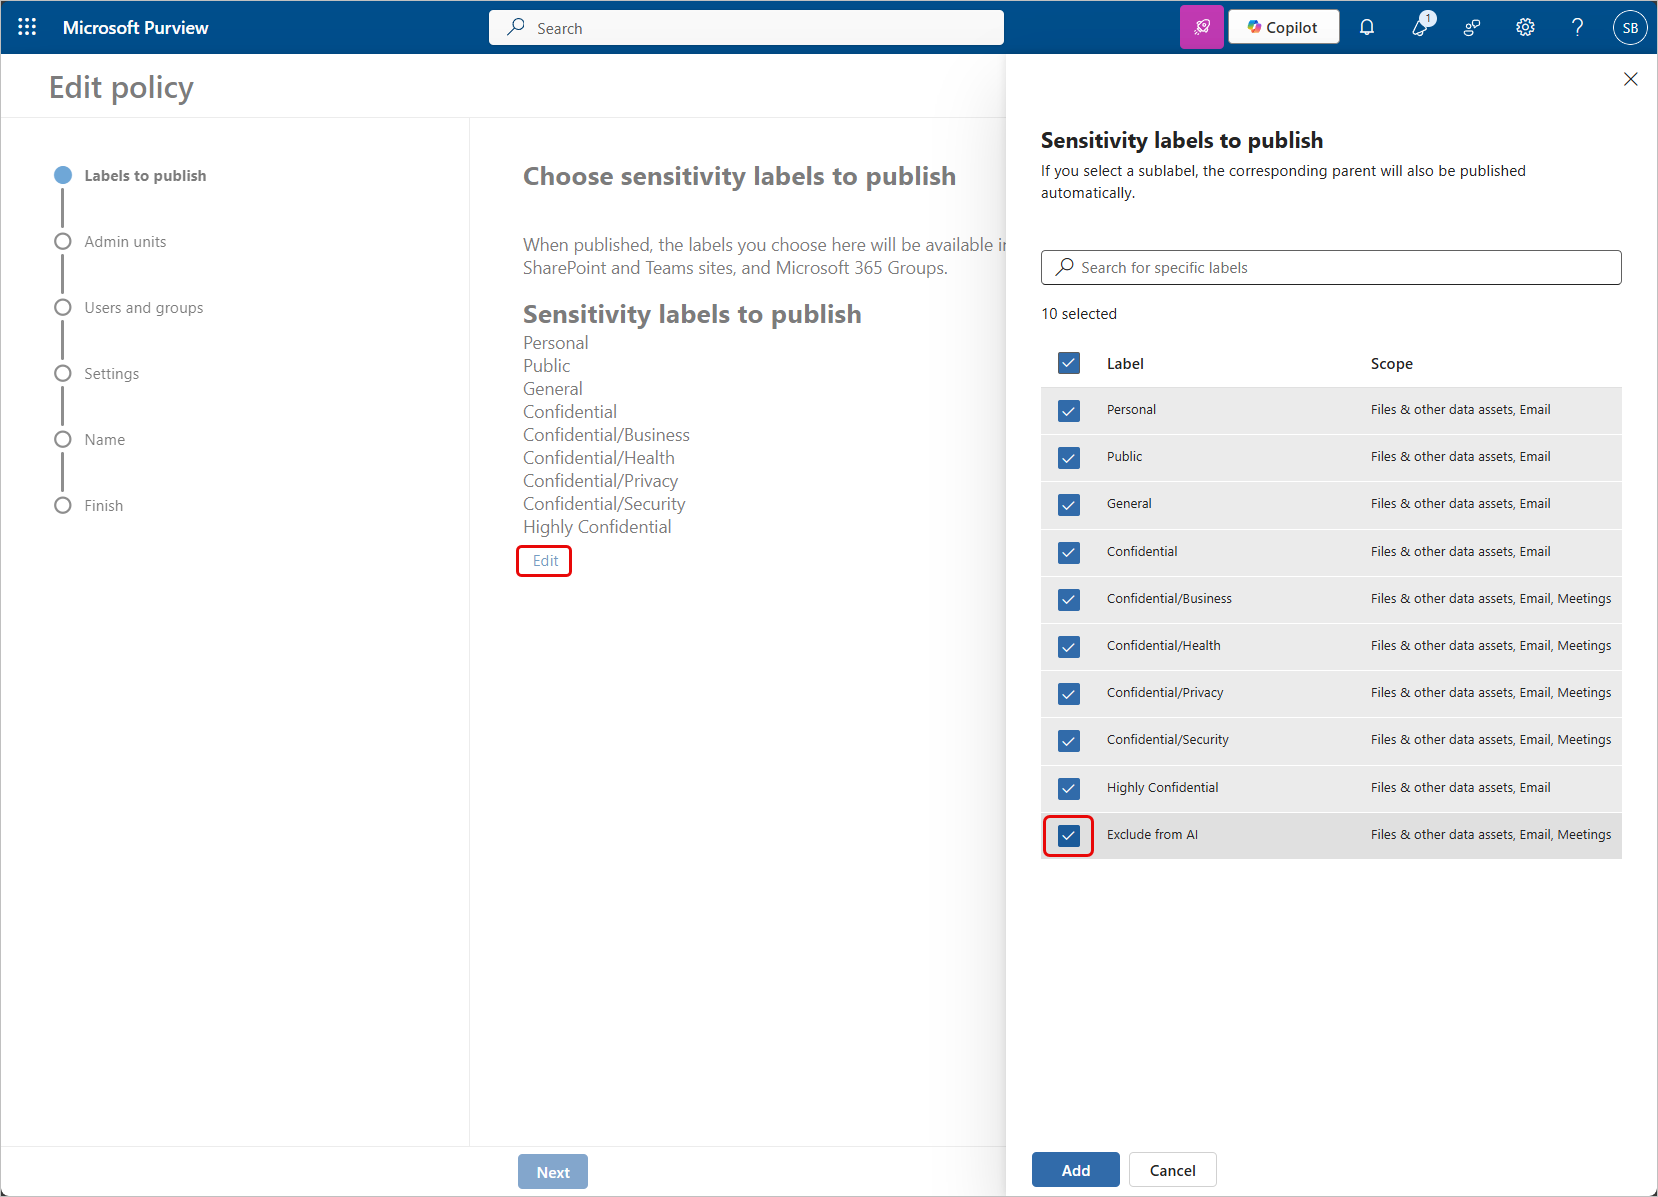
Click Edit to modify the list of labels to publish and select the newly created label, adding it to the list of labels to be published.
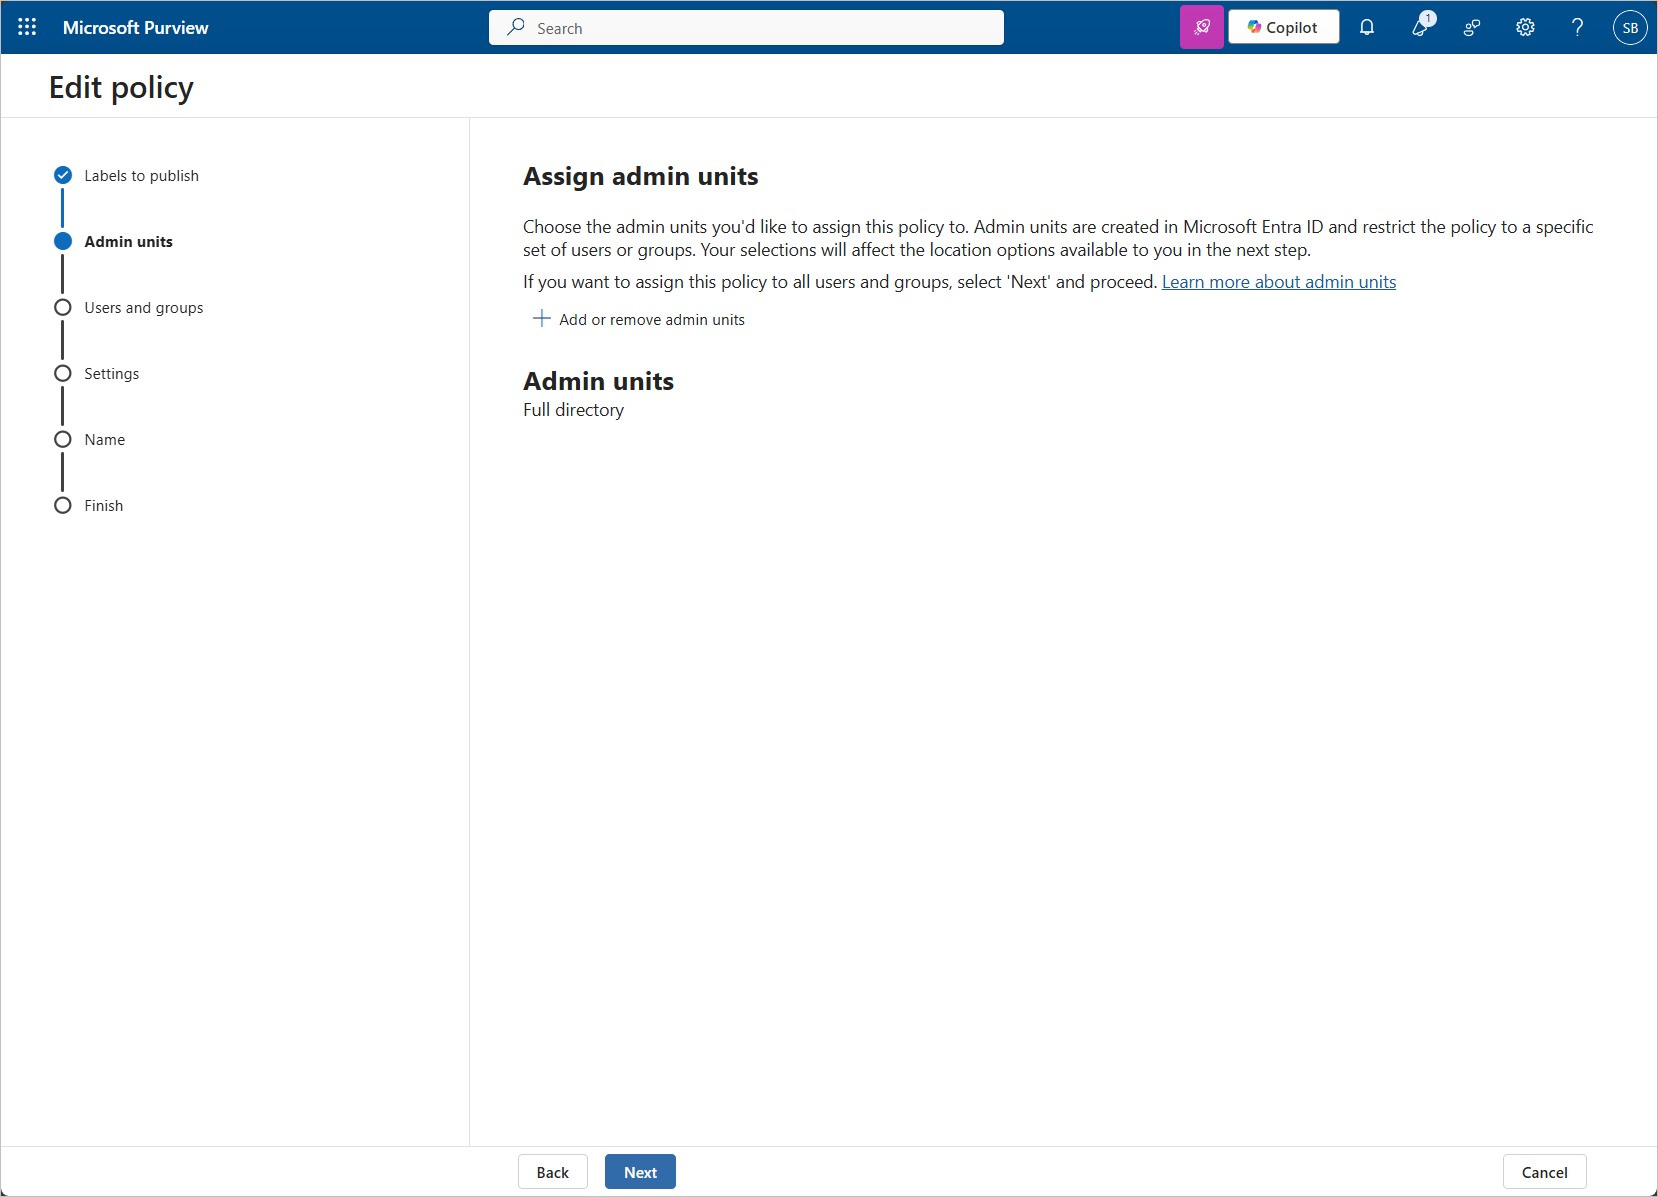
Specify the Admin units if being used. If unsure, leave the Admin units set to Full directory so Copilot information protection can be used everywhere.
Specify the scope for the label. If unsure, leave the scope set to User and groups so Copilot protection is available to everyone.
Configure the Policy settings if being used. If unsure, leave all options deselected - none of these options are required for Copilot protection.

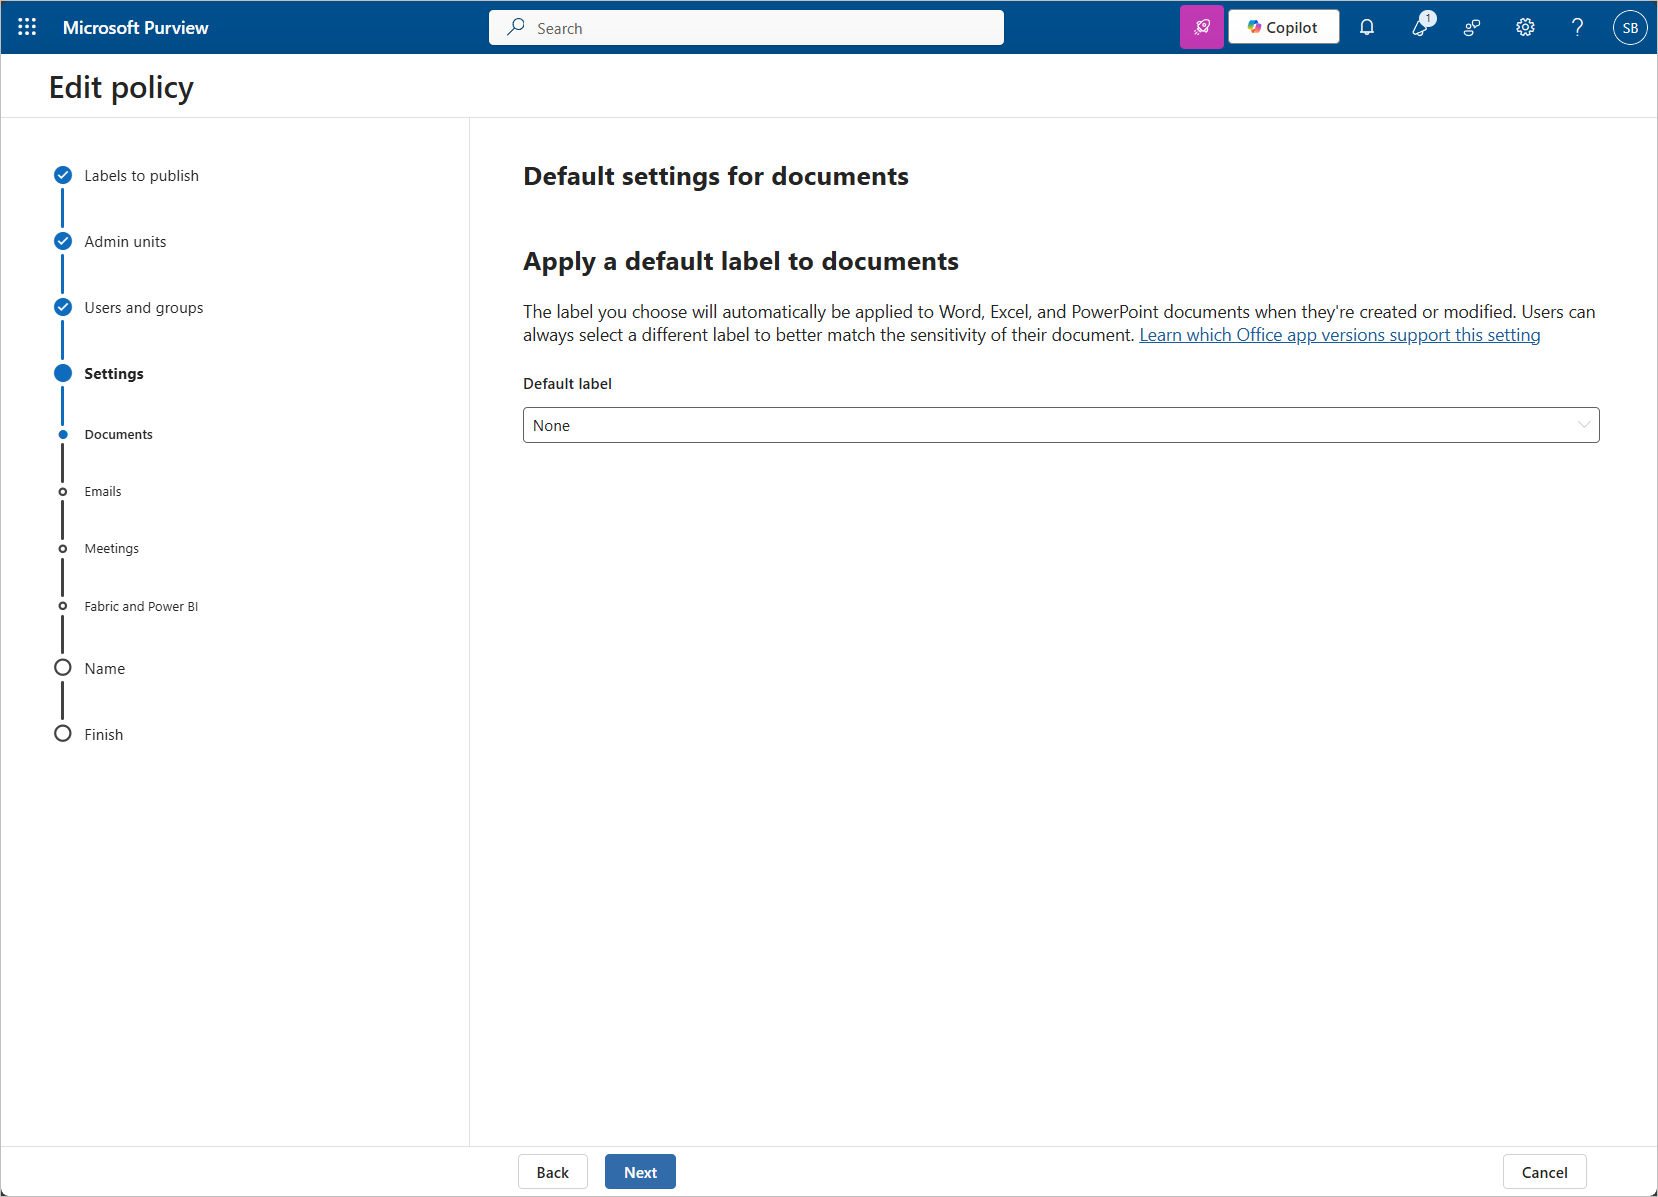
Default labels aren't a required for Copilot protection so, if unsure, leave the Default label set to None and leave the default settings for email, meetings and calendar events, and Fabric and Power BI content.
If creating a new policy, provide a Name, then click Submit on the Review and finish screen to publish the new policy.
Confirming the Data & More Configuration
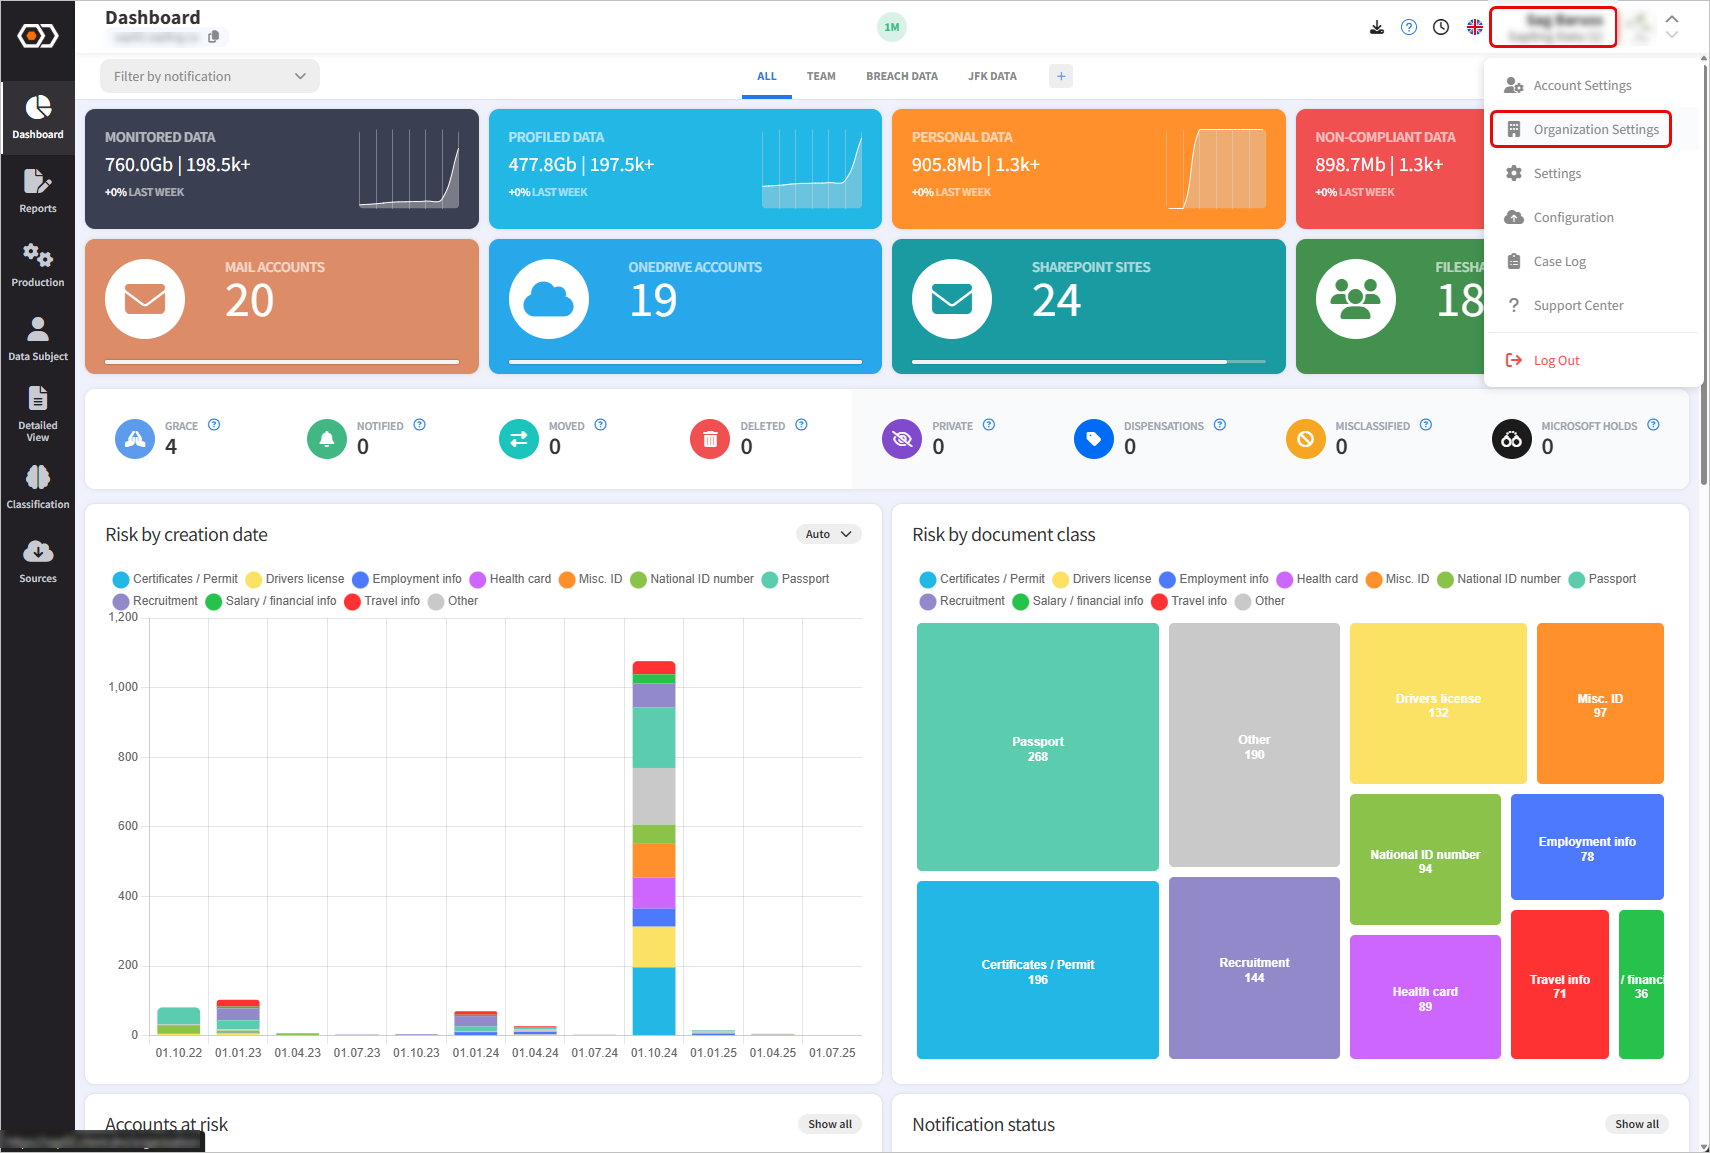
In Data & More, click your name in the top-right corner and select Organization Settings.
In the left-hand navigation, click App registration, then click the edit icon next to the app registration, and confirm InformationProtectionPolicy.Read.All (MIP Labels) has a green check mark next to it.
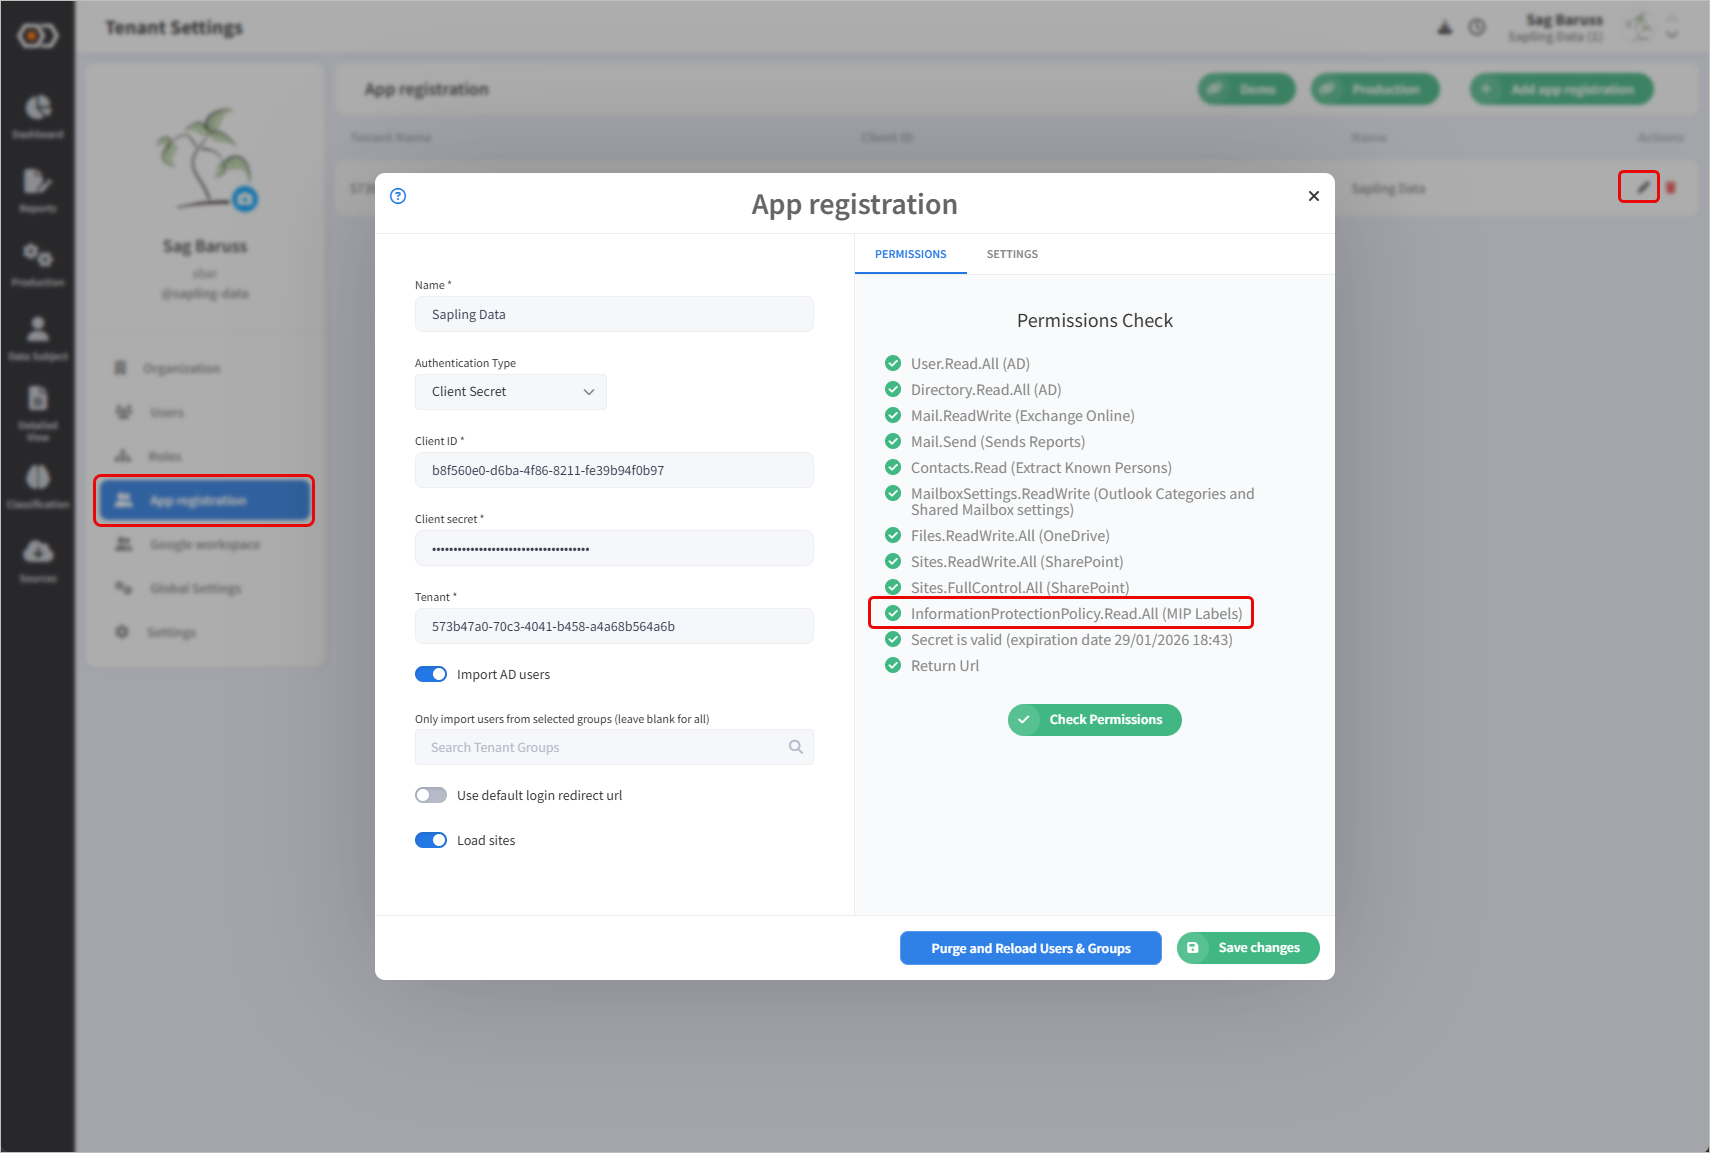
If the green check mark is missing, the permissions for the app registration need to be updated to include the InformationProtectionPolicy.Read.All permission.
To confirm the new label was published properly, in Data & More, click your name in the top-right corner and select Settings. Scroll down to the section called MIP Labels and click Update Labels. Wait a few minutes then click Show/Hide Labels.
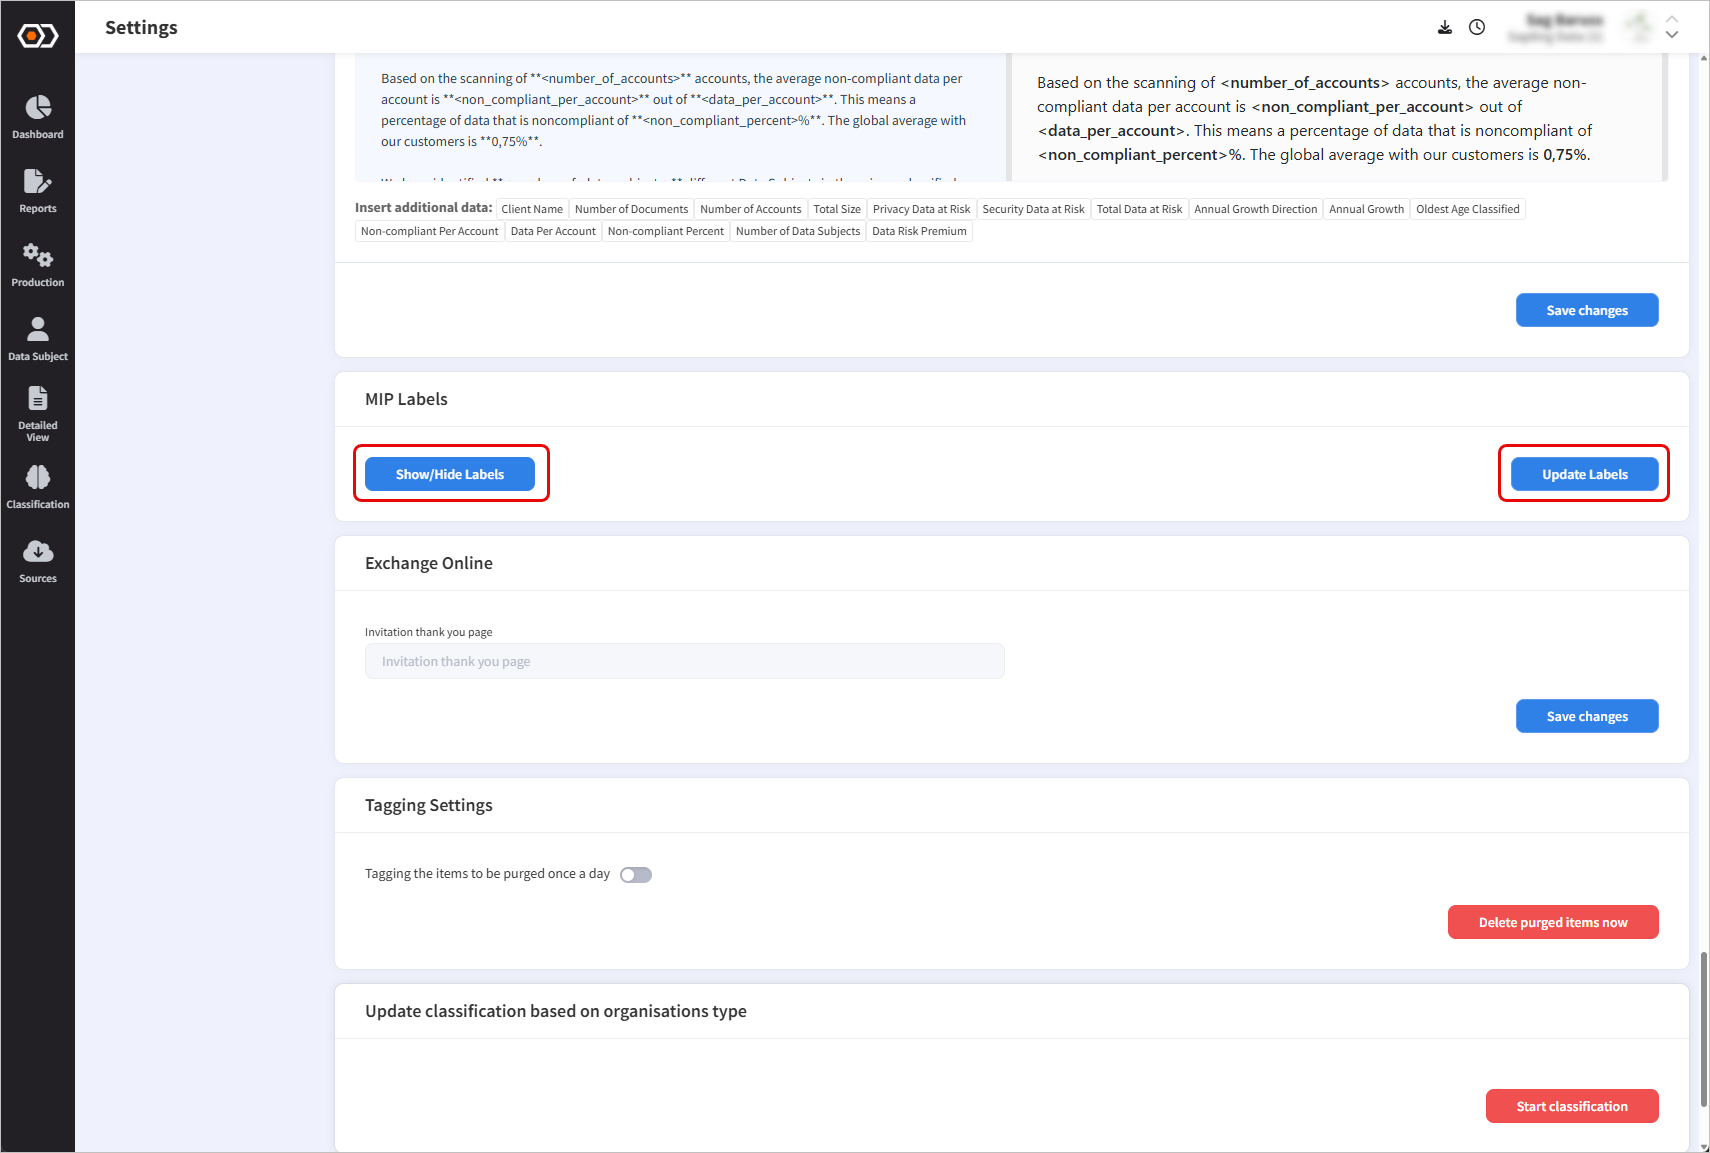
The new label is properly published, fully replicated in Azure, and ready for use with Data & More Copilot Protection when you can see it in the list of MIP Labels.
Now What
Data & More Copilot Protection can now be used to identify items that should be excluded from Copilot processing and assign the new label to them.
For help excluding content from Copilot or for any other functionality related to Data & More Copilot Protection, please reach out to our exceptional Support Team.